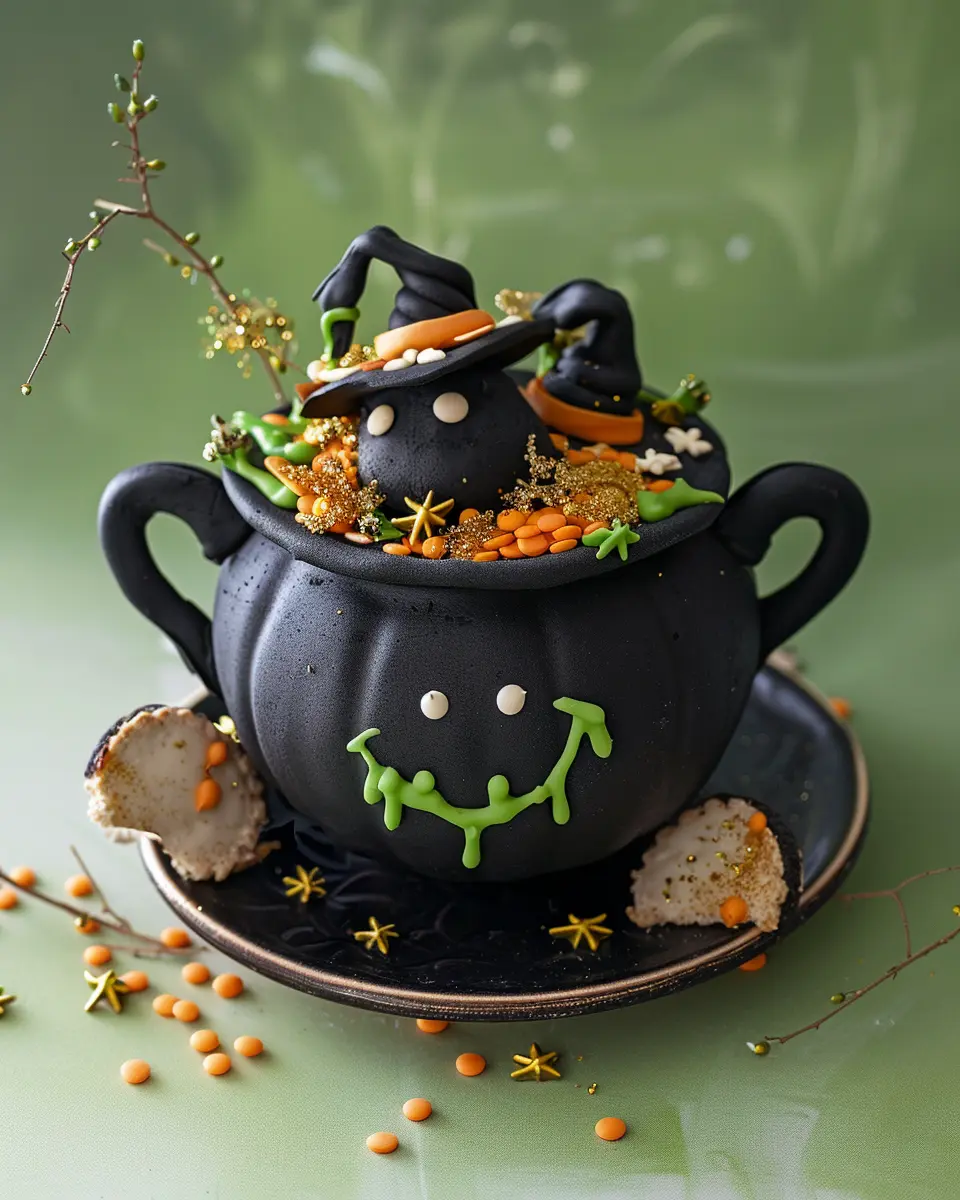
Introduction to Decorating Cauldron Cookies
When you think about Halloween treats, what comes to mind? Spooky decorations, a hint of magic, and, of course, those festive flavors that make the holiday so special. That’s where cauldron cookies come in—they are not just delicious; they also tap into the very spirit of the season. These whimsical cookies offer a creative canvas for decorating, allowing you to express your inner baker and add a dash of personality to your festivities.
Why Cauldron Cookies Are Perfect for Halloween
Imagine hosting a Halloween party where the decor is as important as the food. Cauldron cookies are a delightful way to embrace that theme. The round shape can be easily transformed into miniature cauldrons bubbling over with colorful frosting and edible decorations. Plus, kids and adults alike adore cookies, making them a universal crowd-pleaser.
Here are a few reasons to consider incorporating cauldron cookies into your Halloween plans:
-
Versatile Decorating Options: From classic black and green to vibrant purples and oranges, the color palette for decorating these cookies is practically limitless. You can use everything from icing to sprinkles for extra fun.
-
Imaginative Themes: Whether you want to create a witch’s brew effect or a more whimsical take with friendly ghosts and bats, decorating cauldron cookies opens the door to your creativity. This is your chance to showcase your style in a delicious way.
-
Family Fun: Baking and decorating together can be a wonderful bonding activity. Who doesn’t love a bit of cookie education alongside family and friends? Plus, it’s great for kids to practice their motor skills while creating something scrumptious.
If you’re eager to learn how to decorate cauldron cookies, there are numerous tutorials available online to help you get started like this one. With a few simple techniques and colorful toppings, your cookies will be the star of any Halloween gathering.
So, why not gather your ingredients and get ready to dive into the magical world of cauldron cookie decorating? You might just discover a new favorite holiday tradition!
Ingredients for Decorating Cauldron Cookies
Essential supplies for your cauldron cookies
When learning how to decorate cauldron cookies, having the right supplies at your fingertips is crucial for a smooth and fun decorating experience. Here’s a list of essential ingredients and tools to get you started:
- Sugar cookies: A solid base for your cauldron design. Choose your favorite recipe, or go for a store-bought option.
- Royal icing: This will be your go-to for creating detailed designs. It dries hard and can hold its shape well.
- Food coloring: Get creative! Black, green, and purple shades are great for that spooky vibe.
- Sprinkles: Think of candy eyes, bat shapes, or shimmering edible glitter to make your cookies pop.
- Piping bags and tips: Essential for precise decorating. You can use a simple plastic bag if you don’t have piping bags.
- Edible decorations: Like mini chocolate cauldrons or gummy worms for that extra flair!
With these supplies, you’ll be well on your way to crafting delightful cauldron cookies that are as fun to make as they are to enjoy. For more decorating inspiration, check out resources from culinary experts like this.
Step-by-Step Preparation of Cauldron Cookies
Creating delightful cauldron cookies is an enchanting experience, especially when it comes to decorating them! Follow this step-by-step guide that ensures each cookie is not only tasty but also visually stunning. Whether you’re preparing for a Halloween party or simply indulging your inner pastry wizard, this tutorial will guide you through the process of how to decorate cauldron cookies that will impress your friends and family.
Bake your cauldron cookies to perfection
The journey begins by baking the essential cauldron-shaped cookies. Start with a classic sugar cookie recipe (consider sourcing a well-reviewed one like this sugar cookie recipe), ensure your dough is chilled to keep those crisp edges, and roll it out to a thickness of about a quarter of an inch.
Using a cauldron cookie cutter, carefully cut out your shapes and place them on parchment-lined baking sheets. The key here is to bake them in a preheated oven at 350°F (175°C) until they are just lightly golden around the edges, typically around 8-10 minutes. Remember, over-baking can lead to a hard texture, which isn’t ideal for decorating. Once baked, allow them to cool completely on a wire rack to prevent any melting of your decorative icing later on.
Outline with black icing for a bold design
Now that your cookies have cooled, it’s time to dive into decorating. Grab a piping bag filled with black royal icing, with a small round tip attached. Start outlining the cauldron with steady hands, making sure the lines are clean and bold. This outline will create a canvas for your flood icing later on, adding depth and character to your cookies.
It’s helpful to create a slight “lip” around the top of the cauldron where your potion will sit. If you haven’t piped before, don’t fret! Practice on parchment paper before you tackle the cookies directly.
Fill in the cauldron shape using flood consistency icing
Once your outlines are nice and set, mix up a flood consistency icing—this is slightly thinner than the icing you used to outline. Using the same black icing, fill in the cauldron shape; you want a smooth, even layer.
If the icing runs a bit outside the lines, that’s alright! You can tidy it up, but be quick; the icing needs to remain wet for the best finish. It’s essential to allow this layer to dry for a bit before moving onto the next step, typically around 30 minutes, depending on humidity.
Allow cookies to dry before adding final details
Patience is crucial here! Let your cookies dry completely; this may take several hours or overnight, especially if you’ve applied thick layers of icing. When cookies are fully dried, they’re ready for the final details that will bring them to life.
Consider what story your cauldron will tell. Are you brewing a mystical potion? Adding some whimsical elements can really make a difference!
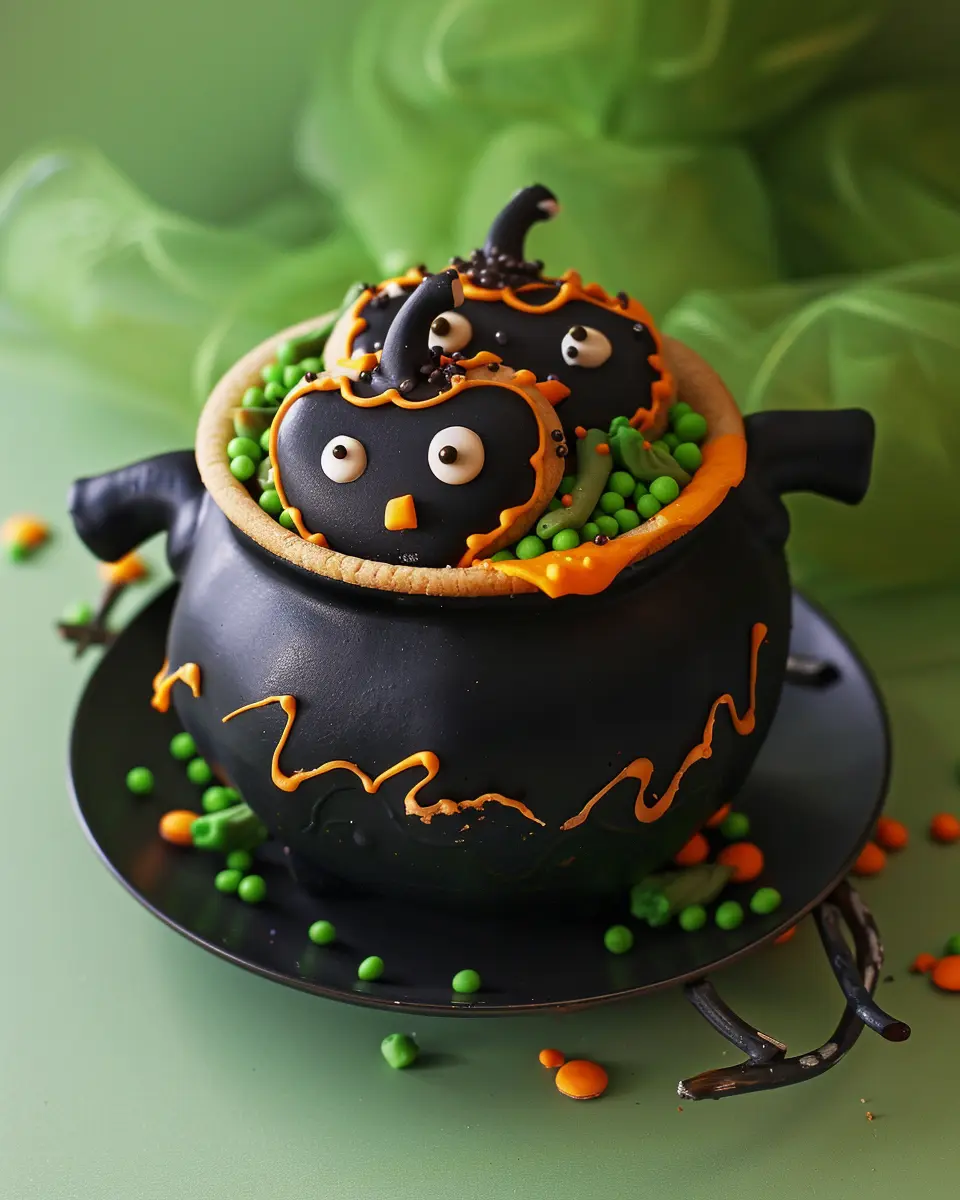
Create a spooky potion effect with lime green icing
To take your decorating to the next level, mix a vibrant lime green icing for the potion effect. Use a piping bag to create a bubbling potion look by adding swirls to the top of the cauldron. This can be achieved with a star tip for added flair, giving a fun and spirited appearance.
Feel free to add edible glitter or small candy “bubbles” for an extra spooky touch. Chocolate eyes or candy worms can also create a lively narrative on top of your cauldron—after all, what’s a witch’s brew without some creepy critters lurking?
By following these steps, you’ll master how to decorate cauldron cookies that are both visually stunning and delicious. So grab your ingredients, gather your friends, and let the baking magic happen—it’s time to conjure up some sweet treats!
If you’re looking for more decorating ideas, consider checking out resources like The Spruce Eats for a wealth of tips and recipes!
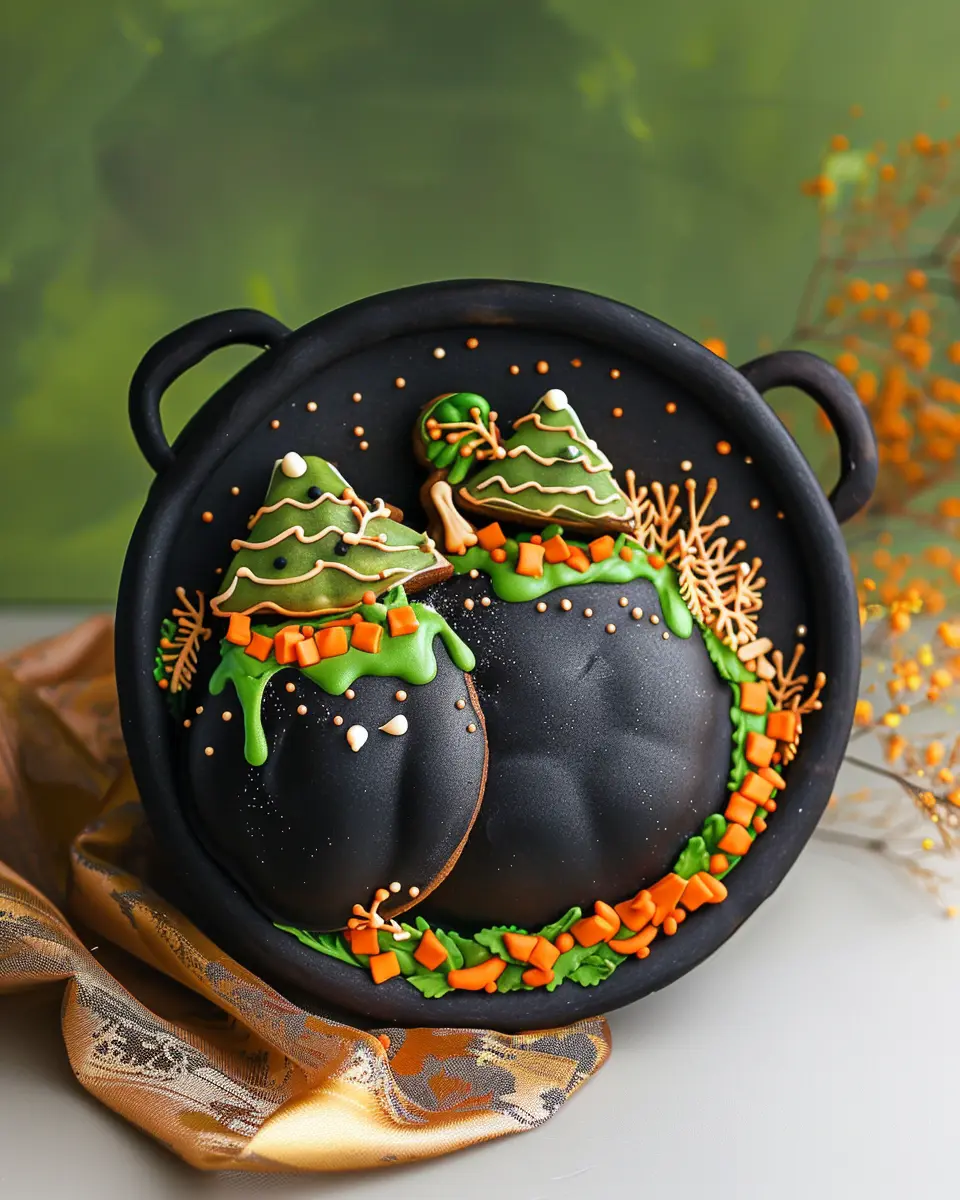
Fun Variations on Cauldron Cookies
When it comes to how to decorate cauldron cookies, the creative possibilities are endless! Let’s dive into some fun variations that will take your cookies from ordinary to extraordinary.
Exploring Different Icing Colors and Designs
The beauty of decorating cauldron cookies lies in the range of icing colors and designs you can experiment with. Instead of sticking with traditional black, why not try a vibrant green or spooky purple? These colors can mimic the magical potions bubbling away in your cauldron.
For a smooth finish, royal icing is a fantastic choice, while a thicker icing can give your cookies that rustic, homemade charm. Consider adding some swirls or drips to your icing to create a dynamic look. You can even utilize edible glitter or metallic sprinkles to give your cauldron a magical touch that’s sure to impress your friends. If you’d like inspiration, sites like Food Network offer great tips on color combinations and techniques.
Adding Unique Toppings to Your Cauldron Cookies
Toppings are a quick and easy way to elevate your cauldron cookies. Imagine topping them with mini chocolate candies, gummy worms, or even crunchy sugary pearls. Get creative! You could crush some candy corn or add chocolate-covered pretzels to simulate the look of ingredients bubbling in a potion.
Consider using flavored icing to complement your cookie base; maybe a chocolate ganache or a pumpkin spice icing—how about a twist on flavors that reflect the Halloween season? Personal favorites include crushed-up candy bars or pumpkin seeds for texture.
Remember, the best part of decorating cookies is letting your imagination run wild, so don’t hesitate to mix and match toppings and designs! With the right approach, you’ll master not just how to decorate cauldron cookies but also how to make them the star of any gathering.
Cooking Tips and Notes for Perfect Cauldron Cookies
Best practices for icing consistency
When learning how to decorate cauldron cookie, icing consistency is crucial. Aim for a “15-second” rule: when you drizzle icing from a spoon, it should take about 15 seconds to smooth into the surface. A thicker consistency is ideal for outlining, while a thinner one works for flooding the cookie. If you find your icing too runny, just add a bit more powdered sugar until you achieve that perfect, spreadable texture.
Troubleshooting common decorating issues
Even seasoned decorators run into hiccups! If your icing is pooling instead of sitting neatly, it may be too thin—don’t fret! Simply adjust with more powdered sugar. Are your colors bleeding together? Consider letting each layer dry before adding another to avoid overlapping. For those perfectionists among us, use piping tips to create detailed designs.
Feeling adventurous? Check out this guide on baking techniques to elevate your cookie game even further!
Serving Suggestions for Cauldron Cookies
Presentation Ideas for Your Halloween Party
When it comes to entertaining guests during Halloween, the presentation of your cauldron cookies can elevate your spooky theme. Consider arranging your cookies on a decorative platter surrounded by fake spider webs and plastic bugs for a fun touch. You could also use mini cauldron containers filled with dry ice (ensure safety first!) for that magical, smoky effect. Adding themed signage, like “Witch’s Treats,” can create an inviting atmosphere that sparks conversations.
Pairing Cauldron Cookies with Themed Drinks
To complement your cauldron cookies, think about serving themed drinks that match the vibe of your gathering. Try a vibrant punch made with ginger ale and fruit juices for a refreshing, non-alcoholic option. The zest of citrus livened up with a hint of mint will balance the sweetness of your cookies beautifully. You can also make a hot chocolate bar, complete with colorful marshmallows and sprinkles, allowing guests to customize their drinks while indulging in your delightful cookies.
Wouldn’t you love to see the joy on your friends’ faces as they enjoy these treats? For tips on how to decorate cauldron cookie variations, check out resources from The Spruce Eats for extra inspiration!
Time Breakdown for Decorating Cauldron Cookies
When you’re tackling the fun project of decorating cauldron cookies, it’s essential to plan your time wisely for the best results. Here’s a quick overview to help you stay organized.
Preparation Time
Getting your ingredients ready is the first step. This usually takes about 15-20 minutes. Gather your cookie dough, frosting supplies, and any fun sprinkles you want.
Icing and Drying Time
After decorating, the cookies need time to dry. Plan on about 30-60 minutes for icing to set properly. If you’re using multiple colors, give each layer some time before adding the next.
Total Time
In total, expect this delightful decorating adventure to take approximately 1.5 to 2 hours. That’s a perfect weekend project and an excellent opportunity to get creative! Want more ideas on fun cookie decorating? Check out this guide on cookie icing techniques!
Enjoy your baking adventure and remember, practice makes perfect when learning how to decorate cauldron cookies!
Nutritional Facts for Cauldron Cookies
Understanding calorie content
When embarking on your how to decorate cauldron cookie adventure, it’s essential to consider the calorie content. A standard cauldron cookie typically contains around 150 calories each, but this can vary based on the ingredients you use and portion size. Balancing indulgence with health is key—using quality ingredients can make a difference. For instance, swapping out some sugar for natural sweeteners can help reduce calories without sacrificing flavor. You can find more insights about calories and ingredients from trusted sources like the USDA Food Data Central.
Nutritional benefits of homemade cookies
Making cookies at home not only allows you to infuse them with love but also benefits your health. Homemade cookies often have fewer preservatives and artificial ingredients compared to store-bought varieties. You can choose whole-grain flours, and incorporate healthier fats like coconut or olive oil. Additionally, you can opt for nutrient-dense add-ins like nuts or dark chocolate, which come with their own perks such as protein and antioxidants. Personalizing your cauldron cookies can transform them from a mere treat into a more wholesome snack option! Did you know that studies show people who prepare their own food tend to make healthier choices?
Embrace your culinary creativity while decorating your cauldron cookies, and not only will you enjoy the process, but you’ll also delight in the benefits of choosing nutritious ingredients!
FAQs about Decorating Cauldron Cookies
Can I use different cookie shapes for Halloween?
Absolutely! While learning how to decorate cauldron cookies is fun, you can be just as creative with other shapes. Halloween offers a variety of themes—think ghosts, pumpkins, or even bats! These shapes can be a great canvas for decoration. If you’re feeling adventurous, you could even mix and match your cookie shapes to create a festive platter. Just remember, no matter the shape, a good outline and vibrant colors will bring the holiday spirit to life.
What if I don’t have cookie cutters?
No cookie cutter? No problem! You can easily craft shapes using a few household items. For example, a glass, sharp knife, or even a template printed from your computer can work wonders. So grab that leftover takeout box, cut it into a suitable shape, and voila—your very own cookie cutter! If you’re feeling artistic, you can even hand-shape your dough into whatever design you desire, adding an extra personalized touch to your spooky treats.
How long will decorated cookies stay fresh?
Once you’ve perfected your cookie decorating skills, you’ll want your creations to last. Generally speaking, decorated cookies can stay fresh for about 1-2 weeks when stored in an airtight container at room temperature. If you want to extend their shelf life, consider freezing them. Just be sure to wrap them tightly in plastic wrap and place them in a freezer-safe container. When you’re ready to enjoy, let them thaw at room temperature—your cookies will taste like a freshly baked treat again!
For more tips on cookie storage, check out this comprehensive guide from King Arthur Baking Company. Happy decorating!
Conclusion on Decorating Cauldron Cookies
Decorating cauldron cookies is more than just a recipe; it’s a delightful blend of fun and creativity. As you learned how to decorate cauldron cookies, you may have discovered the joy of experimenting with colors and textures, transforming plain cookies into charming Halloween treats. Each swirl of icing and sprinkle adds a personal touch that resonates with your unique style.
Whether you’re hosting a spooky soirée or simply enjoying a quiet evening, these cookies are sure to impress. Remember, the art of cookie decorating can be both relaxing and rewarding. For more tips on sweet creations, check out resources like Food Network’s decorating ideas. Embrace the spirit of Halloween, and have fun with every batch!
PrintHow to Decorate Cauldron Cookie: Easy Tips for Spooky Treats
Learn how to decorate spooky cauldron cookies with these easy tips!
- Prep Time: 20 minutes
- Cook Time: 12 minutes
- Total Time: 32 minutes
- Yield: 24 cookies 1x
- Category: Dessert
- Method: Baking
- Cuisine: American
- Diet: Vegetarian
Ingredients
- 2 cups all-purpose flour
- 1 cup unsweetened cocoa powder
- 1 teaspoon baking soda
- 1/2 teaspoon salt
- 1 cup granulated sugar
- 1/2 cup unsalted butter, softened
- 1 large egg
- 1 teaspoon vanilla extract
Instructions
- Preheat your oven to 350°F (175°C).
- In a bowl, mix together flour, cocoa powder, baking soda, and salt.
- In another bowl, cream the sugar and butter until fluffy.
- Add the egg and vanilla extract to the butter mixture and mix well.
- Gradually add the dry ingredients to the wet ingredients until just combined.
- Roll out the dough and cut into cauldron shapes.
- Bake for 10-12 minutes or until set.
- Let cool before decorating.
Notes
- For a spooky effect, use green icing and black sprinkles.
- Store in an airtight container for freshness.
Nutrition
- Serving Size: 1 cookie
- Calories: 150
- Sugar: 10g
- Sodium: 30mg
- Fat: 7g
- Saturated Fat: 4g
- Unsaturated Fat: 2g
- Trans Fat: 0g
- Carbohydrates: 22g
- Fiber: 1g
- Protein: 2g
- Cholesterol: 20mg
Keywords: how to decorate cauldron cookie, spooky treats, Halloween cookies