Introduction to Handmade Sub Rolls
When it comes to sandwiches, the base is just as crucial as the fillings. That’s where handmade sub rolls come into play! Imagine biting into a fresh, warm roll that’s perfectly soft yet sturdy enough to hold all your tasty toppings. Homemade truly makes a difference; let’s explore why.
Why Choose Homemade Over Store-Bought?
Have you ever grabbed a sub roll from the store only to find it stale or lacking flavor? Purchasing rolls from your local grocery can often leave you dissatisfied. Here’s why making your own might just be the game-changer you need:
-
Quality Ingredients: When you bake your own handmade sub rolls, you control what goes in. You can use high-quality flour, organic yeast, and even add herbs for extra flavor. Check out sources like The Spruce Eats for insights on ingredient quality and selection.
-
Customization: Have you tried a sub roll that was a bit too thick or too crumbly? Making your rolls at home means you can tailor the recipe to your preferences. Want an herby blend for a Mediterranean twist? Or maybe you prefer a classic, simple flavor? It’s entirely up to you!
-
Freshness Matters: There’s something magical about the aroma of freshly baked bread wafting through your kitchen. Not only do warm rolls have a delightful texture, but they also bring a sense of nostalgia and comfort.
-
Healthier Choice: By baking at home, you can avoid preservatives and unnecessary additives often found in store-bought options. Plus, you can opt for whole grain or gluten-free alternatives if that’s your thing.
The Joy of Baking
Baking handmade sub rolls is not just about the final product; it’s a rewarding experience. You might even find joy in the kneading process or watching the dough rise. It’s a small act of creativity that allows you to connect with your food. So, what are you waiting for? Grab your apron and let’s dive into a delicious homemade adventure!
Whether you’re preparing for a casual lunch or impressing friends at a gathering, these rolls are your first step toward sandwich perfection. Ready to roll?
Ingredients for Handmade Sub Rolls
Creating delicious handmade sub rolls is easier than you might think! Here’s what you’ll need to whip up these tasty delights:
Essential Ingredients
- All-Purpose Flour: 4 cups for perfect texture.
- Warm Water: 1 ½ cups, around 110°F, to activate the yeast.
- Active Dry Yeast: 1 packet (about 2 ¼ tsp) gives your rolls that wonderful rise.
- Sugar: 2 tablespoons, to feed the yeast and add slight sweetness.
- Salt: 2 teaspoons, enhancing the flavors of your rolls.
- Olive Oil: 2 tablespoons for a hint of richness and softness in every bite.
Optional Flavor Enhancements
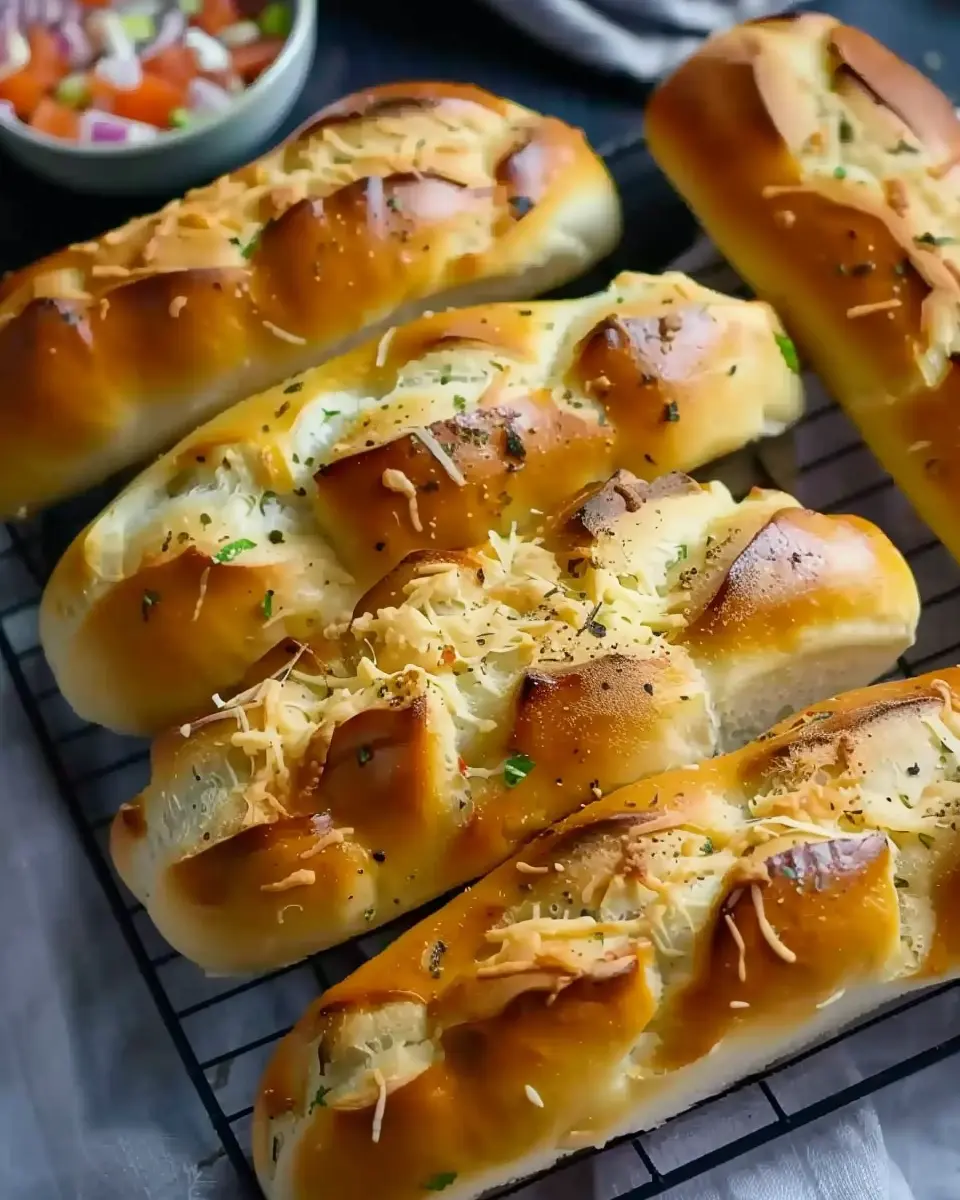
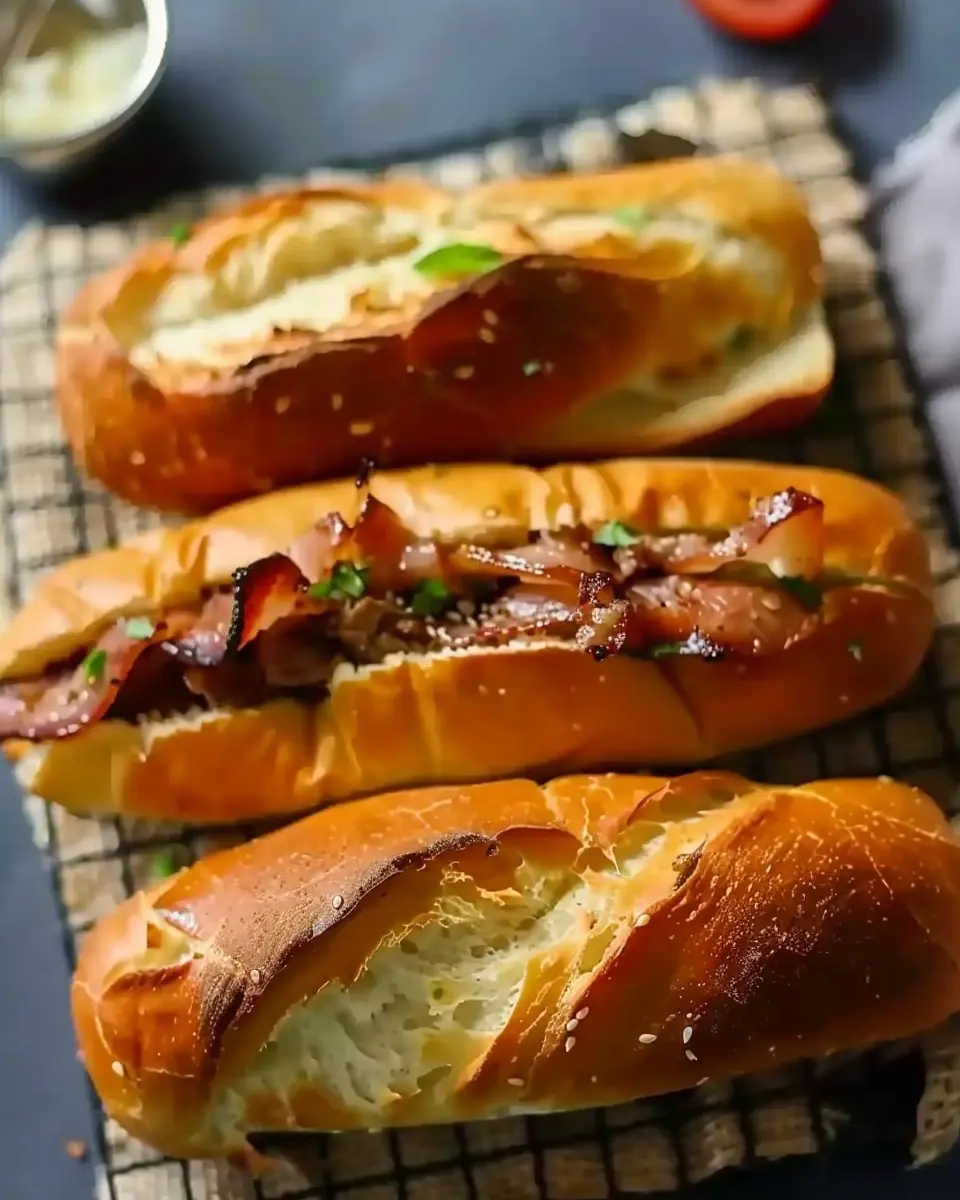
- Garlic Powder or Italian Herbs: A sprinkle can elevate your handmade sub rolls and pair perfectly with fillings like turkey bacon or chicken ham.
- Sesame Seeds: Toasted sesame seeds on top add a delightful crunch.
With these ingredients handy, you’re just steps away from creating your own mouthwatering subs at home! For more tips on mastering bread-making, check out expert resources from the King Arthur Baking Company.
The process of making handmade sub rolls not only brings satisfying aromas to your kitchen but also offers an opportunity to explore culinary creativity. What fillings would you pair with your rolls?
Preparing Handmade Sub Rolls
Handmade sub rolls are the perfect canvas for your favorite fillings, whether it’s a combination of turkey bacon, chicken ham, cheese, and fresh veggies or a vegetarian delight. Here’s a step-by-step guide to crafting your own delicious sub rolls from scratch.
Activate the yeast
Let’s kick things off by activating our yeast. This step is crucial for ensuring your bread rises properly. In a small bowl, combine 1 packet of active dry yeast (approximately 2¼ teaspoons) with 1 cup of warm water (around 110°F or 43°C) and a pinch of sugar. Let it sit for about 5-10 minutes until it becomes frothy. What you’re looking for is that magical bubbling action—proof that your yeast is alive and ready to work its wonders!
Mix the dry ingredients
While the yeast is doing its thing, you can start mixing the dry ingredients. In a large mixing bowl, combine 4 cups of all-purpose flour, 2 teaspoons of salt, and 1 tablespoon of sugar. This combination will provide a nice balance of flavors. You might be tempted to use whole wheat flour for a healthier option, which adds a lovely nutty flavor, but it’s best to stick with all-purpose for the perfect sub roll texture.
Combine wet and dry ingredients
Once your yeast is frothy, it’s time to bring everything together. Pour the activated yeast mixture into the bowl with your dry ingredients, and mix them until a shaggy dough forms. You can use a wooden spoon or your hands—whatever feels comfortable. Remember, this is handmade sub rolls, and the process should feel adventurous!
Knead the dough
Here comes the fun part: kneading! Dust your countertop with a little flour and turn your dough out onto the surface. Knead for about 8-10 minutes until the dough becomes smooth and elastic. If it’s too sticky, sprinkle a bit more flour as needed. Not sure how to knead? Think of it as folding the dough in half and pushing it down with the heel of your hand, then rotating it slightly and repeating.
First rise
After kneading, place the dough in a lightly greased bowl, cover it with a kitchen towel, or plastic wrap, and let it rise in a warm spot for about 1 hour or until it doubles in size. This is the perfect opportunity to prepare your fillings or just enjoy a cup of coffee!
Shape the rolls
Once risen, punch down your dough to release the air, then turn it out onto a floured surface again. Divide the dough into 8 equal pieces. Shape each piece into a roll, folding the edges inward and rolling it on the countertop until it forms a smooth ball. Then, elongate it gently to achieve that classic sub roll shape.
Second rise
Now, it’s time for a second rise. Line a baking sheet with parchment paper and place your shaped rolls on it—make sure to leave some space in between, as they will expand. Cover them again and let them rise for another 30-45 minutes until they puff up beautifully.
Bake the rolls
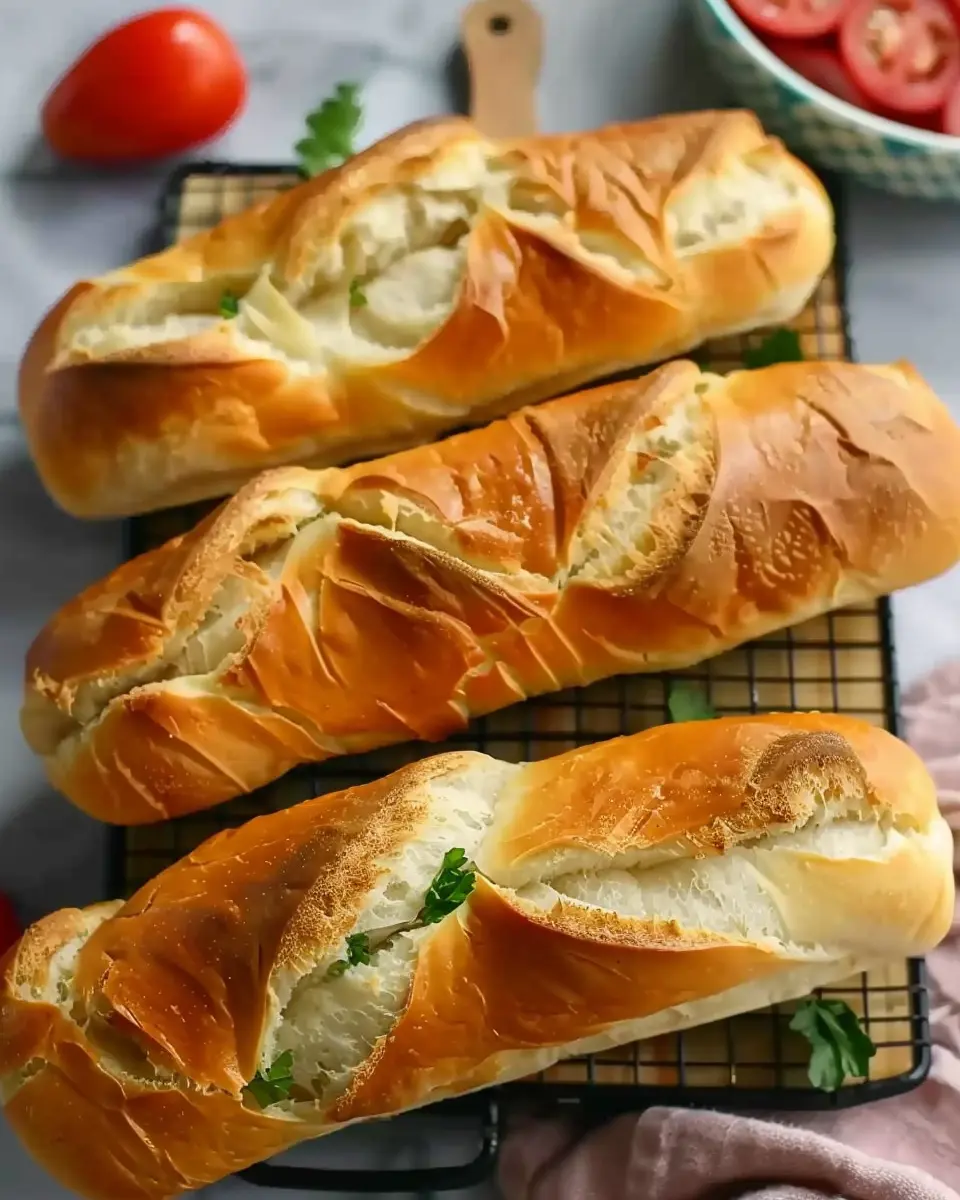
Preheat your oven to 375°F (190°C). Just before placing your rolls in the oven, you can add a little touch by brushing the tops with a mix of egg wash (1 beaten egg) and a splash of water for that gorgeous golden color. Bake for about 20-25 minutes until they are golden brown and sound hollow when tapped.
And just like that, you’ll have freshly baked, delicious handmade sub rolls ready, perfect for any filling you desire! Do you have a favorite sub roll filling? Share your creations with us! You might want to check out some popular filling ideas from sources like Bon Appétit or Serious Eats for extra inspiration. Enjoy your baking adventure!

Variations on Handmade Sub Rolls
When it comes to crafting the perfect handmade sub rolls, the beauty lies in their versatility. By playing around with different ingredients, you can create unique flavors that cater to your taste preferences. Let’s explore two delightful variations that will undoubtedly upgrade your sandwich game.
Whole Grain Sub Rolls
If you’re looking to amp up the health factor, whole grain sub rolls are a fantastic option. Made with whole wheat flour, these rolls are packed with fiber and essential nutrients. Switching to whole grain not only provides a nutty flavor but also contributes to better digestive health. Here’s how to make them more exciting:
- Ingredients: Use a mix of whole wheat and all-purpose flour for a balanced texture.
- Add Seeds: Incorporate seeds like sunflower or sesame for a pleasant crunch.
- Supplement with Grains: Quinoa or flaxseed can be added for extra protein and omega-3s.
Feeling adventurous? You can find a wonderful whole grain flour recipe here.
Herb-Infused Sub Rolls
Imagine biting into a handmade sub roll that bursts with the fragrance of fresh herbs. Herb-infused sub rolls are not just a treat; they elevate your meal to a whole new level. Here’s how to achieve that:
- Herb Choices: Use rosemary, thyme, or oregano for aromatic flavors.
- Infused Oils: Brush your rolls with olive oil infused with garlic or herbs before baking; this adds richness.
- Toppings: Sprinkle fresh chopped herbs on top before baking for an eye-catching finish.
Adding these small touches will impress your friends and family. Explore more about herb use in baking in this insightful guide.
No matter which variation you choose, these handmade sub rolls will be a favorite at your dinner table!
Cooking Tips and Notes for Handmade Sub Rolls
When whipping up handmade sub rolls, there are a few tips to keep in mind to elevate your baking game. First, always use fresh ingredients; your flour, yeast, and even your toppings make a significant difference in flavor and texture. For the best results, try using bread flour instead of all-purpose flour. It contains more protein, which adds that perfect chewiness we all love.
Pay attention to rising times. Dough that has doubled in size means it’s primed for shaping! Remember, the dough should feel slightly tacky but not sticky when you knead it—this indicates the right moisture level.
If you’re aiming for perfectly golden crusts, use a baking stone or steel; they help distribute heat evenly.
For fantastic filling ideas, consider turkey bacon or chicken ham, which make for delicious, healthier alternatives. Want more tips? Check out King Arthur Baking for expert advice on bread-making! This simple guide can transform your next sandwich experience.
Serving Suggestions for Handmade Sub Rolls
When it comes to enjoying handmade sub rolls, the possibilities are endless! These fluffy creations are perfect for a quick lunch or a relaxed dinner with friends. Here are some delightful serving ideas to elevate your meal experience.
Satisfy Your Cravings with Meaty Fillings
For a protein-packed delight, consider filling your sub rolls with:
- Turkey Bacon: Crispy strips nestled in fresh greens add a smoky flavor.
- Chicken Ham: A leaner alternative to traditional ham, perfect for layering with cheese.
- Beef: Flavorful slices paired with your favorite condiments make for a satisfying bite.
Fresh and Flavorful Toppings
Don’t forget to load up on fresh veggies and spreads!
- Add crunchy lettuce, ripe tomatoes, and sliced cucumbers for freshness.
- Incorporate creamy spreads like avocado or hummus for rich textures.
- A drizzle of balsamic glaze or olive oil can enhance the flavor profile beautifully.
Perfect Pairings
To complete the meal, serve your handmade sub rolls with:
- A side of crispy potato wedges or homemade chips for that satisfying crunch.
- A refreshing salad to balance the richness of the fillings.
By combining these elements, you’ll craft a meal that not only satisfies but also delights. Try these suggestions, and your handmade sub rolls will become a favorite in no time! If you’re looking for inspiration on various fillings, check out this comprehensive guide for more ideas.
Time Breakdown for Handmade Sub Rolls
When you’re crafting delicious handmade sub rolls, it’s essential to know how your time will be spent. This helps you plan your meal prep or weekend baking session efficiently.
Preparation time
Getting started with your handmade sub rolls takes about 15 minutes. This includes gathering your ingredients, measuring flour, water, yeast, and any other essentials.
Rising time
The dough needs about 1 hour to rise. It’s the perfect time to relax, check your favorite show, or even prep your fillings. Just make sure it’s in a warm spot!
Baking time
Once the dough has risen, you’ll spend around 20 minutes baking those lovely rolls until they’re golden brown and irresistible.
Total time
In total, you’re looking at approximately 1 hour and 35 minutes from start to finish. That’s not too bad for the satisfaction of enjoying handmade sub rolls straight from your oven!
For more tips on timing and techniques, explore resources like King Arthur Baking for expert advice.
Nutritional Facts for Handmade Sub Rolls
When it comes to making handmade sub rolls, understanding the nutritional profile is key to enjoying them guilt-free! Here’s what you need to know:
Calories
Each sub roll generally contains around 150-200 calories, making them a satisfying yet not too heavy option for your sandwich cravings.
Carbohydrates
These rolls are primarily composed of carbohydrates, averaging about 30-35 grams per roll. This makes them a great source of energy, especially if you’re gearing up for a busy day or a workout.
Protein
You can expect around 4-6 grams of protein from each roll. While not a primary protein source, pairing your handmade sub rolls with lean proteins like Turkey Bacon or Chicken Ham can turn them into a well-rounded meal.
For more detailed nutrition insights, consider checking sites like USDA FoodData Central or NutritionData for additional resources. Enjoy your baking adventure!
FAQs about Handmade Sub Rolls
Can I freeze handmade sub rolls?
Absolutely! Freezing your handmade sub rolls is a great way to preserve their deliciousness for later use. Once baked and cooled completely, wrap each roll tightly in plastic wrap and then place them in a freezer-safe bag. They can be kept frozen for up to three months. When you’re ready to use them, simply thaw them at room temperature or pop them in the oven for a few minutes to refresh their texture.
How do I store leftover sub rolls?
To keep your leftover handmade sub rolls fresh, store them in an airtight container at room temperature for up to three days. If you want them to last longer, consider refrigeration, but this may dry them out a bit. Alternatively, you can revive them by wrapping them in foil and heating them in the oven — a great way to enjoy that fresh-baked taste!
What fillings go best with these rolls?
When it comes to fillings, the possibilities are endless! A few favorites include:
- Turkey Bacon and avocado for a savory kick.
- Chicken Ham paired with fresh greens and a light mayo spread.
- Classic deli beef piled high with your choice of toppings.
- Vegetarian options like grilled vegetables or hummus for a fresh, healthy alternative.
Feeling adventurous? Try mixing different spreads and toppings to create your own unique sub! For more ideas, check out resources like Taste of Home and Food Network for inspiration.
Whether it’s meal prep for the week or hosting friends, handmade sub rolls are a perfect fit for any occasion!
Conclusion on Handmade Sub Rolls
Creating your own handmade sub rolls is not just about delicious results; it’s also a fun, rewarding experience. Whether you’re hosting a weekend barbecue or simply looking for an easy dinner solution, these rolls elevate any sandwich. Consider trying different fillings like turkey bacon or chicken ham to suit your taste. Plus, you can experiment with spices and herbs for an extra flavor kick!
Making bread at home strengthens your baking skills and brings a cozy warmth to your kitchen. So roll up your sleeves, embrace the process, and enjoy your delightful creations! For more baking inspiration, check out King Arthur Baking for tips and tricks.
PrintHandmade Sub Rolls: The Best Turkey Bacon and Chicken Ham Delight

A delicious recipe for handmade sub rolls filled with turkey bacon and chicken ham.
- Prep Time: 20 minutes
- Cook Time: 25 minutes
- Total Time: 1 hour 45 minutes
- Yield: 8 rolls 1x
- Category: Baked Goods
- Method: Baking
- Cuisine: American
- Diet: Omnivore
Ingredients
- 4 cups all-purpose flour
- 1 tablespoon sugar
- 1 tablespoon salt
- 2 tablespoons olive oil
- 1 packet instant yeast
- 1 ½ cups warm water
- 8 slices turkey bacon
- 8 slices chicken ham
Instructions
- In a bowl, mix the flour, sugar, salt, and yeast.
- Add warm water and olive oil, mix until a dough forms.
- Knead the dough for about 10 minutes until smooth.
- Let the dough rise for 1 hour until doubled in size.
- Divide the dough into smaller portions, shape into sub rolls.
- Allow the shaped rolls to rise for another 30 minutes.
- Bake at 375°F for 25 minutes until golden brown.
- Cool, then assemble with turkey bacon and chicken ham.
Notes
- Use fresh ingredients for the best flavor.
- Feel free to add your favorite toppings.
Nutrition
- Serving Size: 1 roll
- Calories: 250
- Sugar: 1g
- Sodium: 300mg
- Fat: 5g
- Saturated Fat: 1g
- Unsaturated Fat: 3g
- Trans Fat: 0g
- Carbohydrates: 45g
- Fiber: 2g
- Protein: 10g
- Cholesterol: 20mg
Keywords: Handmade Sub Rolls, Turkey Bacon, Chicken Ham