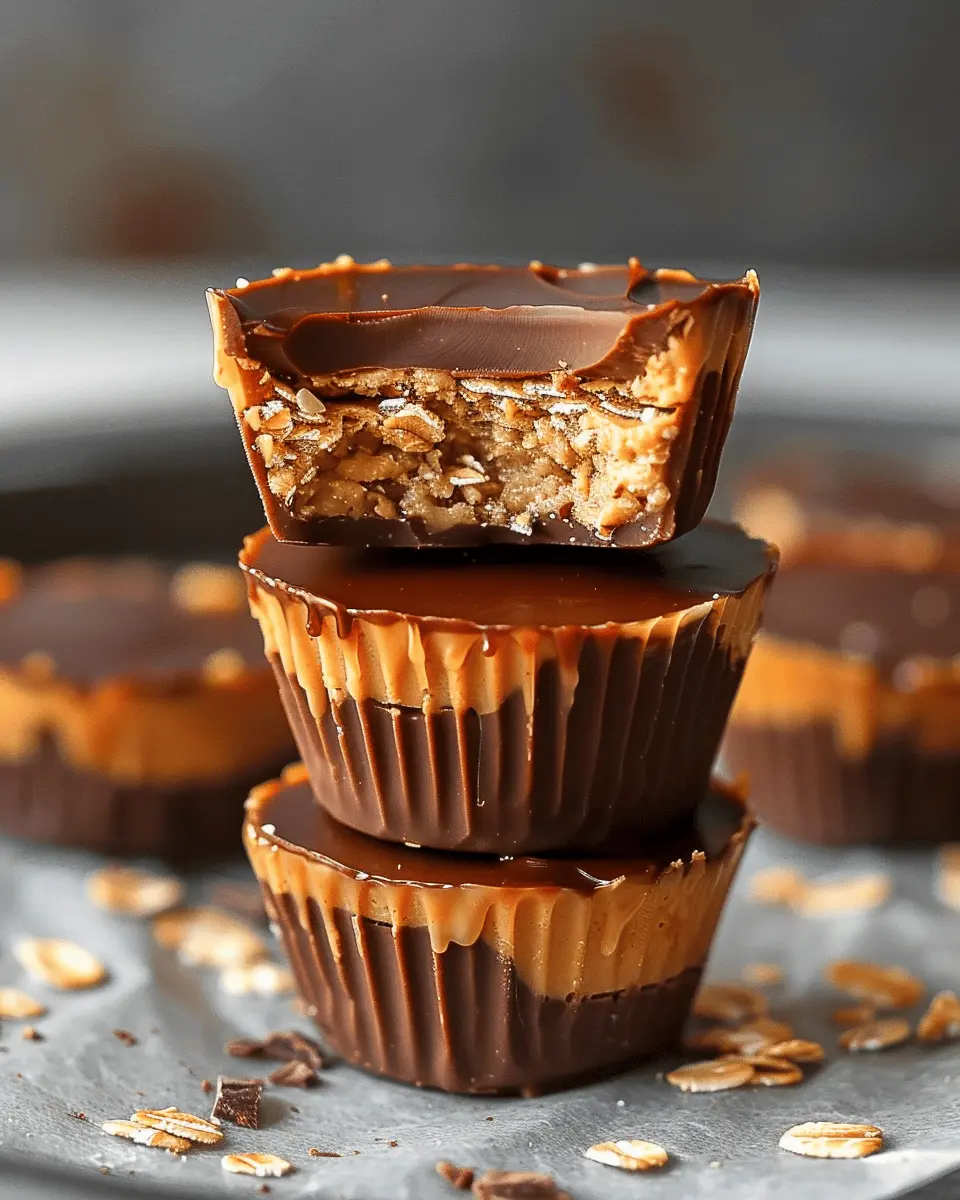
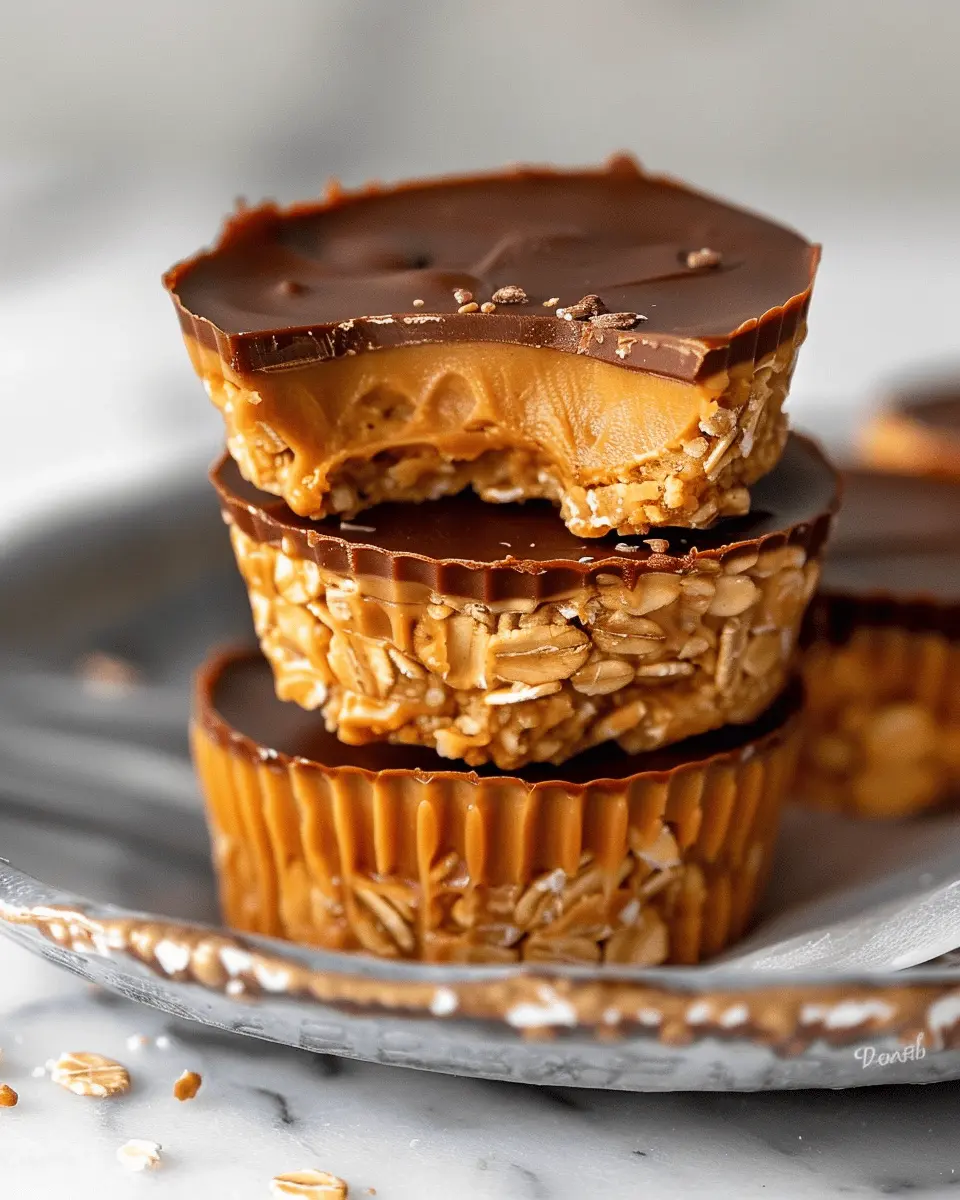
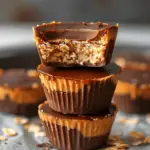
Introduction to No Bake Peanut Butter Oat Cups
When it comes to whipping up a tasty and nutritious snack, no bake peanut butter oat cups are the way to go! These little treats are not only simple to make, but they also save you the hassle of turning on the oven, making them perfect for those warm days when the last thing you want is to heat up the kitchen. Imagine how great it feels to indulge in a sweet, satisfying snack without having to worry about all the fuss traditionally associated with baking.
Why No Bake Peanut Butter Oat Cups Are a Game Changer
No bake peanut butter oat cups are a fantastic option for busy young professionals who are constantly on the go. With just a handful of ingredients—think oats, peanut butter, honey, and a selection of your favorite mix-ins—you can create a healthy yet delicious snack that will fuel your afternoon. According to the American Heart Association, incorporating whole grains like oats into your diet can help improve heart health and keep you fuller for longer.
Here’s why these delightful cups are a must-try:
-
Quick & Easy: Simply mix your ingredients, pour the mixture into cups, and let them chill in the fridge. No elaborate prep or cooking skills required!
-
Customizable: Want to add some dark chocolate chips? Go for it! Prefer to throw in dried fruits or nuts? There’s no wrong way here. Customize your cups to suit your taste or dietary preferences.
-
Nutritious: Packed with protein from the peanut butter and fiber from the oats, these cups are a guilt-free treat that can support your energy levels during busy workdays.
-
Portable: Toss a few in a container, and you have a perfect snack for work or on-the-go. These cups fit easily in your bag, making them an ideal choice for busy lifestyles.
Next time you’re in need of a quick snack or a healthy meal prep option for the week, remember that no bake peanut butter oat cups are waiting to be made. Join me as we dive into the delicious details of crafting these easy, tasty treats!
Ingredients for No Bake Peanut Butter Oat Cups
Essential Ingredients for an Amazing Taste
Creating delicious no bake peanut butter oat cups is all about using the right ingredients. Here’s what you’ll need to whip up these tasty treats:
- Rolled Oats: The foundation of your oat cups, rolled oats provide fiber and a nice chewy texture.
- Peanut Butter: Creamy or crunchy, this is what gives your cups a rich, nutty flavor. Choose a natural variety for a healthier option.
- Honey or Maple Syrup: These natural sweeteners not only add sweetness but also bind everything together beautifully. You can choose to use a plant-based syrup if you’re looking for vegan options.
- Chocolate Chips: Semi-sweet or dark chocolate chips add a delightful surprise in each bite. Plus, who doesn’t love chocolate?
- Vanilla Extract: A splash of this enhances the overall flavor and creates a wonderful aroma.
- Salt: Just a pinch balances the sweetness and rounds out the flavor profile.
With these simple, wholesome ingredients, your no bake peanut butter oat cups will be a hit. Want to learn about the nutritional benefits of oats? Check out this informative article. Now, let your creative cooking journey begin!
Step-by-Step Preparation of No Bake Peanut Butter Oat Cups
Making delicious no bake peanut butter oat cups is a fun and rewarding experience, perfect for those who want a quick, healthful treat without the fuss of baking. Let’s walk through the steps to create these delightful snacks that combine creamy peanut butter, hearty oats, and a touch of sweetness. Grab your apron, and let’s get started!
Gather Your Ingredients
Before diving into the preparation, it’s essential to have all your ingredients on hand. Here’s what you’ll need:
- 1 cup natural peanut butter (preferably smooth)
- 1/3 cup pure maple syrup
- 1 cup rolled oats
- 1/2 cup oat flour (or you can blend rolled oats to make your own)
- 1 cup dark chocolate chips (you can use dairy-free for a vegan option)
- A pinch of salt (optional for added flavor)
Having everything ready not only makes the process smoother but also enhances the cooking experience—less stress means more fun!
Melt Peanut Butter and Maple Syrup
Start by combining the peanut butter and maple syrup in a microwave-safe bowl. Heat them in short bursts of about 15-20 seconds until they’re just melted; remember to stir in between! This will ensure they blend well and you won’t end up with a hot, bubbling mess. The mixture should be smooth and creamy, creating the perfect base for your no bake peanut butter oat cups.
Mix in Oat Flour
Once you have that delicious peanut butter and maple syrup mixture ready, it’s time to incorporate the oat flour. Gradually mix in the flour while stirring to keep the texture consistent. The goal is to achieve a thick, dough-like consistency that’s easy to handle. Oat flour not only adds nutritional value but also binds the ingredients together beautifully, making your oat cups hearty and satisfying.
Prepare Your Muffin Pan
While mixing the batters, preheat or prepare your muffin pan. You can use a regular muffin tin or silicone molds for easy removal. If you’re using a metal tin, lightly grease it with cooking spray to prevent sticking. For silicone molds, there’s often no need to grease, which makes them super handy! This preparation step is crucial; it ensures your delicious treats pop out effortlessly later on.
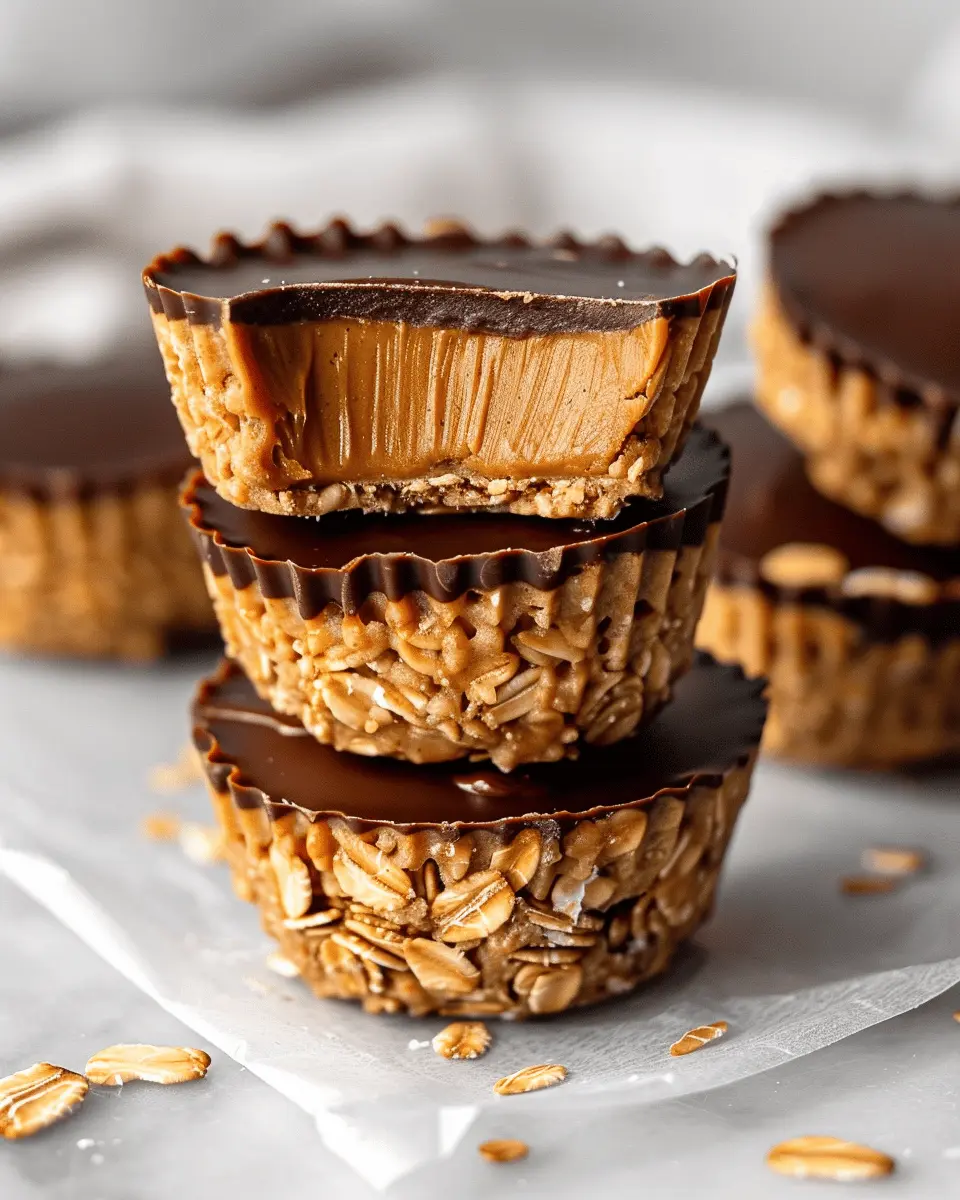
Scoop and Press the Mixture into the Pan
Now comes the fun part! Scoop the peanut butter oat mixture into your prepared muffin pan—about 1-2 tablespoons per cup should do. Use the back of a spoon or your fingers to press the mixture down firmly. This helps them hold their shape once set. You want to ensure they are compact and even; uneven cups might suffer from structural challenges later (think crumbles instead of bites!).
Melt the Chocolate Topping
While your oat cups begin to take shape, it’s time for the icing on the cake—literally, the chocolate! Melt the chocolate chips in a microwave-safe bowl using the same method you used before; remember to stir every 20 seconds until smooth. This chocolate topping is what makes these no bake peanut butter oat cups truly irresistible.
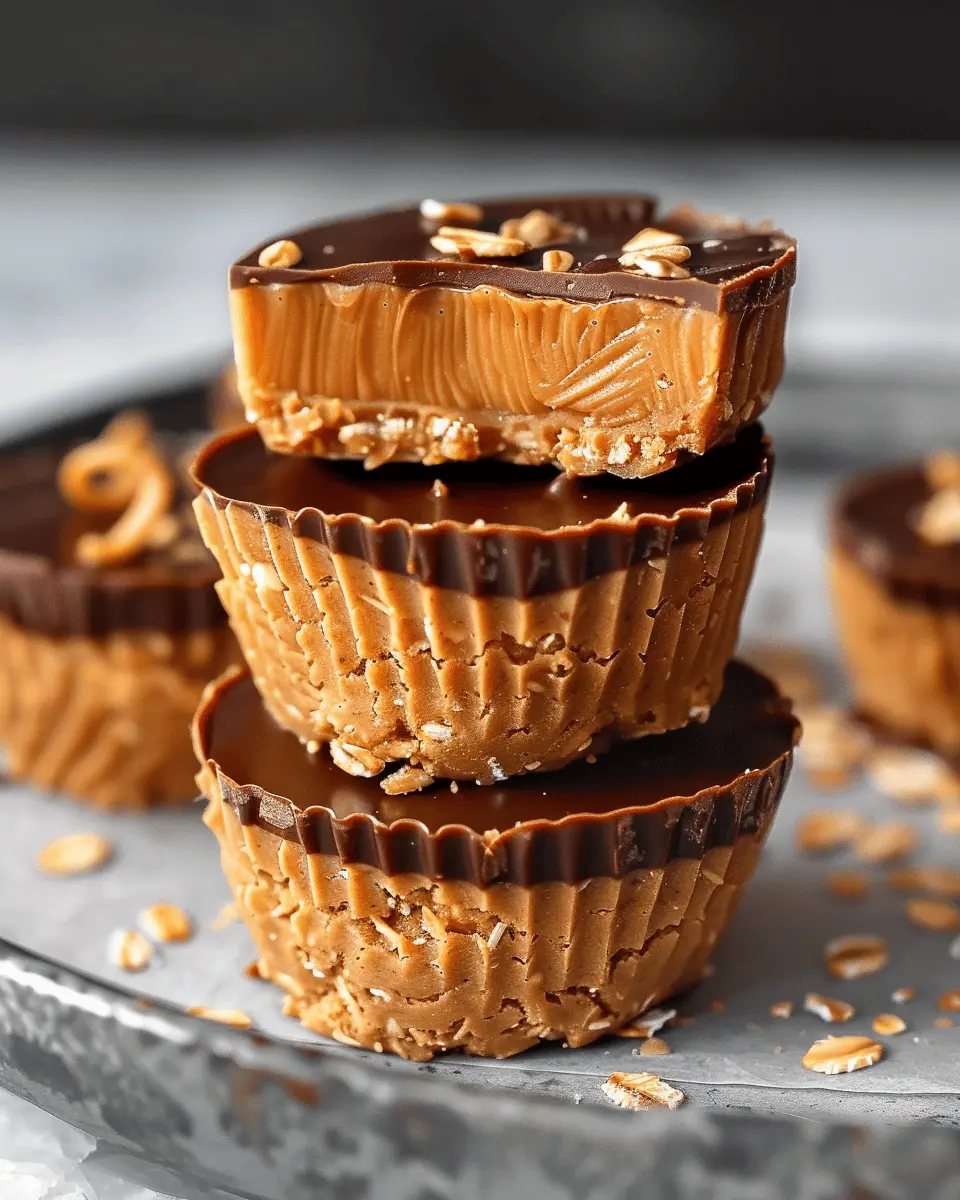
Add the Chocolate Layer
Using a spoon or a piping bag, drizzle the melted chocolate over each oat cup until they’re well-covered. Feel free to get creative—some folks love to add a sprinkle of sea salt or crushed nuts on top for an extra crunch. This step not only adds flavor but gives your treats a beautiful appearance, perfect for sharing with friends (or keeping them all to yourself!).
Chill and Set
Finally, it’s time for the magic of chilling. Place your muffin pan in the refrigerator for at least 30 minutes to an hour. This allows the chocolate to set and the oat cups to firm up. Trust me, the wait will be worth it! Once they’re ready, simply lift them out of the pan, and enjoy your homemade no bake peanut butter oat cups—a sweet treat that doesn’t compromise on health.
Now that you’ve mastered the process, you can experiment with different mix-ins and toppings. Will you try adding dried fruits, nuts, or a different type of nut butter? The possibilities are endless! Enjoy your no bake adventure, and happy snacking!
Variations on No Bake Peanut Butter Oat Cups
No bake peanut butter oat cups are incredibly versatile, allowing you to play around with flavors and ingredients. Let’s explore some fun variations that can take your healthy treat to the next level!
Add-Ins for Extra Flavor
While the classic version is delightful, don’t shy away from experimenting with add-ins. Here are some tasty options:
- Chocolate Chips: A handful of dark chocolate chips can add a rich sweetness and pair beautifully with the peanut butter.
- Nuts and Seeds: Incorporate chopped almonds, walnuts, or pumpkin seeds for a crunchy texture. Each option brings a unique taste and healthy fats.
- Dried Fruits: Adding currents, raisins, or chopped dried apricots provides natural sweetness and a chewy consistency that’s hard to resist.
- Spices: A sprinkle of cinnamon or a dash of vanilla extract can elevate the flavor profile dramatically.
Healthier Swaps for Ingredients
Feeling like you want to make your no bake peanut butter oat cups even healthier? Consider these swaps:
- Nut Butters: If you’re looking for alternatives to peanut butter, try almond or sunflower seed butter. Each option offers distinct flavors and nutritional benefits.
- Sweeteners: Instead of honey or maple syrup, experiment with mashed bananas or unsweetened applesauce for a lower-sugar option.
- Oats: Use gluten-free oats if you need to avoid gluten, ensuring everyone can enjoy your treat.
- Coconut Oil: Instead of butter, consider using coconut oil to give your oat cups a delightful flavor while adding healthy fats.
With these variations, your no bake peanut butter oat cups can cater to any palate or dietary need, making them an ideal snack for any occasion. Happy baking, or should I say, mixing? For more tips on healthy snacking, check out Healthline’s guide on smart snack choices!
Cooking Tips and Notes for No Bake Peanut Butter Oat Cups
Common Mistakes to Avoid
When making no bake peanut butter oat cups, it’s easy to get tripped up. Here are some common pitfalls to steer clear of:
- Incorrect Measurements: Accurate measuring is key! Too much peanut butter can lead to overly sticky cups, while not enough can mean a lack of flavor. Use a kitchen scale for precise results.
- Choosing the Wrong Oats: Quick oats and rolled oats can affect texture. Stick to rolled oats for that perfect chewy bite. If you’re curious about oatmeal varieties, check out sites like Healthline.
- Forgetting to Chill: Don’t rush the chilling time—these cups need it to set properly. If you break the cool-down rule, you could end up with a gooey disaster instead of delicious treats.
Creating no bake peanut butter oat cups is a fun process, but avoid shortcuts to ensure they turn out just right. Share your experiences and tips in the comments—what’s a mistake you’ve learned from in the kitchen?
Serving Suggestions for No Bake Peanut Butter Oat Cups
Perfect Pairings for Anytime Snacking
When it comes to enjoying your no bake peanut butter oat cups, the possibilities are delightfully endless! Not only are these cups packed with protein and flavor, but they can also be easily elevated for different occasions. Here are some serving suggestions that will satisfy your cravings while keeping you energized throughout the day.
-
Breakfast Delight: Start your morning right by pairing your oat cups with Greek yogurt and a drizzle of honey. The creaminess of yogurt complements the nutty flavor, making for a nutritious breakfast.
-
Post-Workout Boost: After a workout, enjoy your no bake peanut butter oat cups with a banana or a handful of nuts. This combo will help replenish your energy levels, fueling your body for the rest of the day.
-
Snack Attack: For an afternoon pick-me-up, try serving these oat cups with a refreshing smoothie made from spinach, pineapple, and almond milk. It’s a perfect way to incorporate more greens into your diet.
These simple yet satisfying serving ideas not only enhance the experience of your oat cups but also provide varied nutritional benefits. If you’re curious about discovering more pairings, check out this article on healthy snacks.
Time Breakdown for No Bake Peanut Butter Oat Cups
Preparation Time
Getting started on these no bake peanut butter oat cups is a breeze! You’ll need just about 15 minutes to gather your ingredients, mix everything together, and portion them into your favorite cups or molds. Perfect for a quick evening snack or meal prep!
Chilling Time
Now, the hardest part: waiting! You’ll want to chill your oat cups for at least 30 minutes in the fridge. This helps them firm up so you get that satisfying texture when you take a bite. It’s like a mini exercise in patience!
Total Time
All said and done, you’re looking at about 45 minutes from start to finish. In the grand scheme of meal prepping or sweet snacking, that’s a small investment for a deliciously satisfying treat. If you’re curious about other tasty options, consider exploring healthier snack ideas to complement your meal plan!
Nutritional Facts for No Bake Peanut Butter Oat Cups
When you’re looking for a quick and wholesome snack, no bake peanut butter oat cups are a fantastic choice. Let’s break it down:
Calories
Each cup contains approximately 120 calories, making it a satisfying snack without the guilt. Perfect for those afternoon cravings without feeling weighed down!
Fats and Carbs
These oat cups feature about 7 grams of healthy fats from the peanut butter, primarily from unsaturated sources. They also boast roughly 15 grams of carbohydrates, providing energy for your busy day.
Protein Content
With around 4 grams of protein per cup, they’re a great way to help keep you full. Incorporating protein-rich snacks like these can support muscle health and keep those hunger pangs at bay.
For more information about nutrition and health benefits, check out sources like Healthline or the American Heart Association. Enjoy your healthy snacking!
FAQs About No Bake Peanut Butter Oat Cups
How Long Do the Peanut Butter Oat Cups Last?
One of the best things about no bake peanut butter oat cups is their staying power. In the refrigerator, you can expect them to last up to a week. If you want to keep them fresh even longer, you can freeze them! Just store them in an airtight container or freezer bag, and they should maintain their delightful flavor for about 3 months. Trust me, having a stash of these handy during a busy week is a game-changer.
Can I Use Other Nut Butters?
Absolutely! While the recipe calls for peanut butter, feel free to get creative. Almond butter, cashew butter, or sunflower seed butter can provide different tastes and textures. If you’re in the mood for something adventurous, experiment with flavored nut butters for a unique twist. Just keep in mind that the consistency might vary a bit, so adjust your ingredient ratios as needed.
Are These Cups Gluten-Free?
Yes, many brands of oats are gluten-free, making no bake peanut butter oat cups a fantastic option. Just make sure to choose oats that are certified gluten-free, especially if you’re sensitive or have celiac disease. Pair these delicious cups with other gluten-free ingredients, such as honey or maple syrup, and you’ve got a treat that everyone can enjoy.
If you’re curious about more variations, check out this resource for gluten-free tips and swaps! And if you’re a fan of nut-free options, here’s a guide to help you navigate your choices.
Conclusion on No Bake Peanut Butter Oat Cups
Final Thoughts on Your Delicious Creation
As you take that first bite of your no bake peanut butter oat cups, you’ll find that it’s an explosion of flavor and texture that’s both satisfying and nourishing. These easy-to-make treats are perfect for busy lifestyles, allowing you to indulge without the oven.
Remember, they can be easily customized! Add in your favorite mix-ins like chopped nuts or dried fruit for a personal touch. These delightful cups not only serve as a quick snack or breakfast option but are also a fantastic source of energy—ideal for those mid-afternoon slumps. So, gather your ingredients and start crafting these delicious oat cups; your taste buds will thank you!
For more inspiration, check out EatingWell for healthy alternatives or ideas.
PrintNo Bake Peanut Butter Oat Cups: Easy, Healthy Indulgence at Home
Deliciously easy no bake peanut butter oat cups that are healthy and indulgent.
- Prep Time: 10 minutes
- Cook Time: 0 minutes
- Total Time: 40 minutes
- Yield: 12 servings 1x
- Category: Snack
- Method: No Bake
- Cuisine: American
- Diet: Gluten-Free
Ingredients
- 2 cups rolled oats
- 1 cup natural peanut butter
- 1/3 cup honey or maple syrup
- 1/4 cup chocolate chips
- 1 teaspoon vanilla extract
Instructions
- In a large bowl, mix together the rolled oats, peanut butter, honey or maple syrup, chocolate chips, and vanilla extract until well combined.
- Press the mixture firmly into a lined or greased tray.
- Refrigerate for at least 30 minutes to allow it to set.
- Once set, cut into squares or bars and enjoy!
Notes
- For extra flavor, consider adding a pinch of salt or some chopped nuts.
- These cups can be stored in the fridge for up to a week.
Nutrition
- Serving Size: 1 cup
- Calories: 150
- Sugar: 8g
- Sodium: 50mg
- Fat: 8g
- Saturated Fat: 2g
- Unsaturated Fat: 5g
- Trans Fat: 0g
- Carbohydrates: 15g
- Fiber: 2g
- Protein: 5g
- Cholesterol: 0mg
Keywords: No Bake Peanut Butter Oat Cups