Introduction to Spring Blossom Cookies
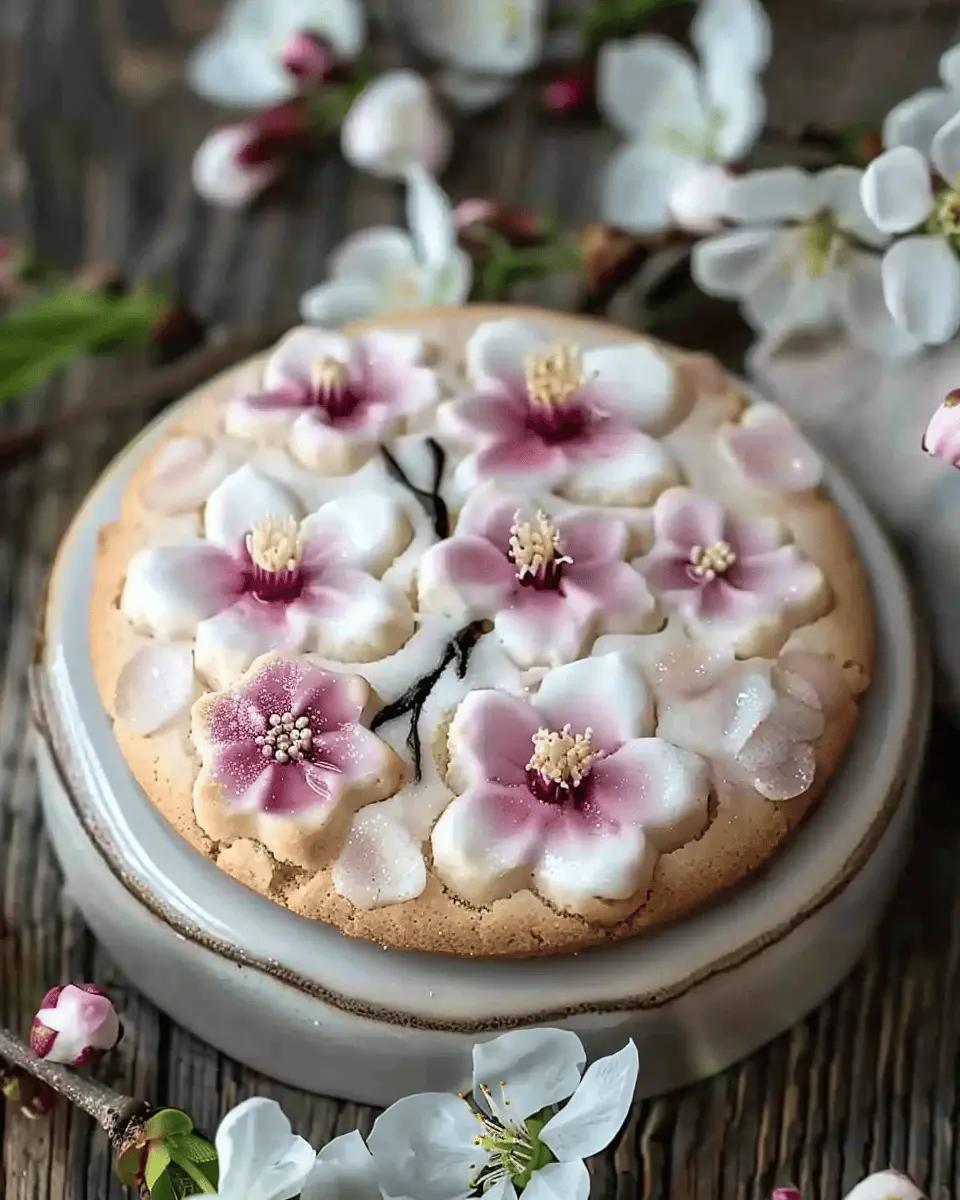
As the days grow longer and blooms begin to pop up all around us, there’s something enchanting about spring that inspires baking. Spring Blossom Cookies are a delightful way to celebrate this vibrant season, offering not only a treat for the taste buds but also an eye-catching addition to any gathering. These cookies are simple to make, and their light, floral flavors evoke the very essence of spring.
Why Spring Blossom Cookies are the Perfect Homemade Treat
Imagine the sweet aroma of freshly baked cookies wafting through your kitchen, mingling with the scent of blossoming flowers. Spring Blossom Cookies are perfect for cozy afternoons at home or lively springtime gatherings with friends and family. Here’s why you should whip up a batch soon:
-
Bright Flavors: These cookies often feature citrusy zest—think lemon or orange—that beautifully complements the sweetness. The flavors are refreshing, making them a great pick-me-up treat.
-
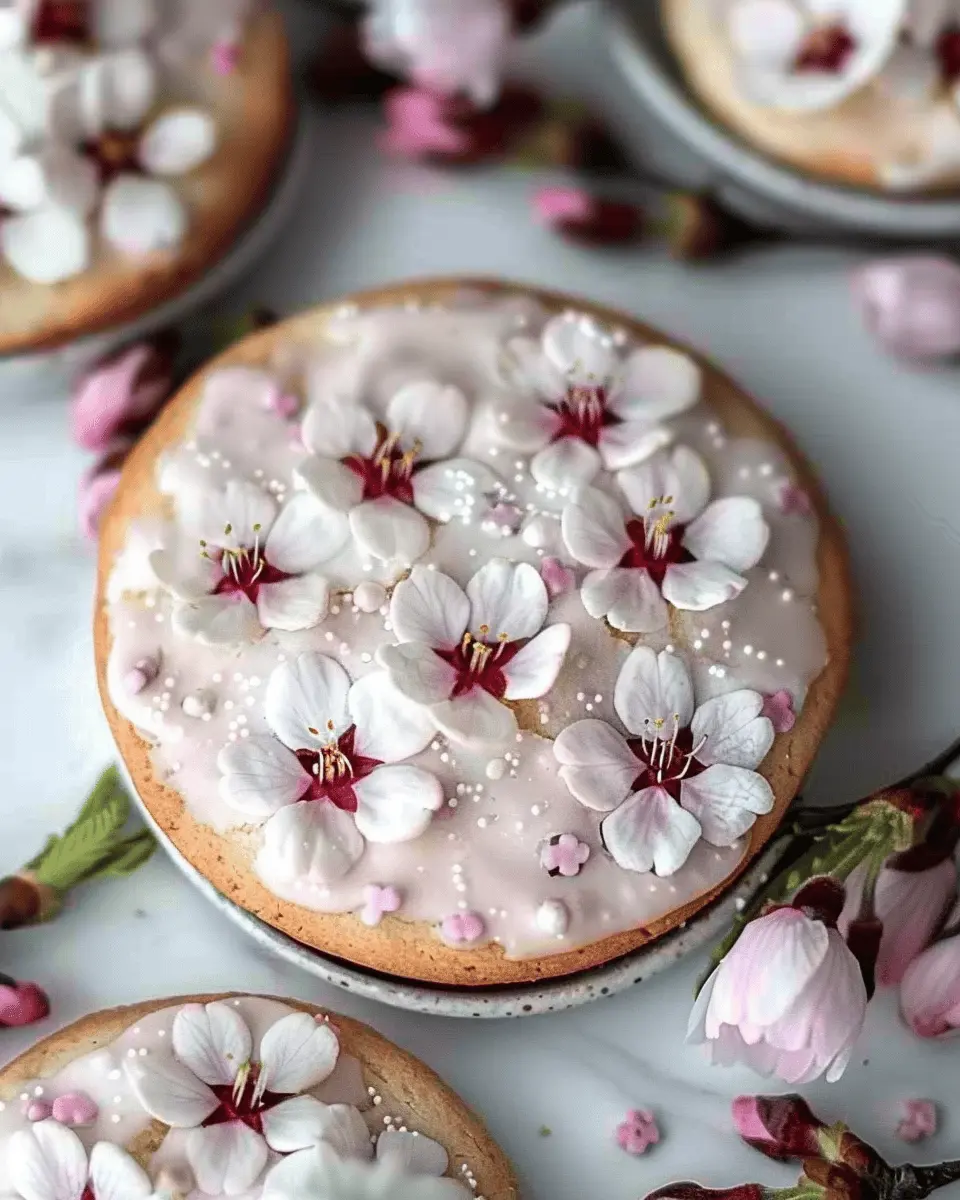
Versatile Decorations: What sets these cookies apart is their versatility. You can decorate them with pastel-colored icing or sprinkle edible flowers on top for a whimsical touch. They’re not just cookies; they’re little works of art!
-
Easy to Make: Perfect for busy young professionals, the recipe is quick and requires minimal ingredients. Even if you’re new to baking, you’ll find that Spring Blossom Cookies are surprisingly forgiving and fun to make.
-
Shareable Joy: Bringing a batch of homemade cookies to a picnic or a spring party is a thoughtful gesture that’s sure to impress. After all, what better way to share the joy of the season than with something deliciously homemade?
Plus, baking can be a fantastic stress-reliever; a recent study highlighted that whipping up some cookies can significantly decrease anxiety levels (source: American Psychological Association). So, while you enjoy the process of making Spring Blossom Cookies, you might also find a little peace and serenity.
In conclusion, whether you’re celebrating the season or simply treating yourself, these cookies are a must-try. Stay tuned for the complete recipe and let’s bring a little spring into your kitchen!

Ingredients for Spring Blossom Cookies
Spring is the perfect time to embrace the flavors and colors of the season. To create your delightful spring blossom cookies, you’ll need some simple yet vibrant ingredients that bring joy and cheer to your kitchen. Here’s what you’ll need:
- 2 cups all-purpose flour: This is your cookie base, providing structure and texture.
- 1 teaspoon baking powder: For that perfect rise, making your cookies light and fluffy.
- ½ teaspoon baking soda: This will help the cookies spread beautifully while still maintaining a chewy texture.
- ½ teaspoon salt: Just enough to balance the sweetness and enhance the flavor.
- 1 cup unsalted butter, softened: Butter is key for richness and that melt-in-your-mouth quality.
- 1 cup granulated sugar: Sweetness is essential, and this will help your cookies turn golden.
- 1 cup brown sugar, packed: Adds moisture and a slight caramel flavor that’s irresistible.
- 2 large eggs: Binding agents that also contribute to a tender texture.
- 2 teaspoons vanilla extract: For that warm, aromatic essence to elevate your cookies.
- 1 cup spring-themed sprinkles: These will add a burst of color and fun.
With these ingredients, you’re well on your way to baking spring blossom cookies that not only taste amazing but also look fabulous on any spring table! If you’re curious about how different types of flour affect baking, check out this resource on flour types. Happy baking!
Step-by-Step Preparation of Spring Blossom Cookies
Creating delightful spring blossom cookies is not only about baking but embracing the essence of the season. With every bite, these cookies are bursting with flavors and colors that celebrate the arrival of warmer days and blooming flowers. Let’s dive into the step-by-step preparation that will make you the star of any gathering.
Gather Your Ingredients
Before you get started, it’s crucial to have everything on hand so that the process goes smoothly. Here’s what you’ll need for your spring blossom cookies:
- 2 cups all-purpose flour
- 1 teaspoon baking powder
- 1/2 teaspoon baking soda
- 1/4 teaspoon salt
- 1 cup unsalted butter (softened)
- 1 cup granulated sugar
- 1/2 cup brown sugar (packed)
- 2 large eggs
- 1 teaspoon vanilla extract
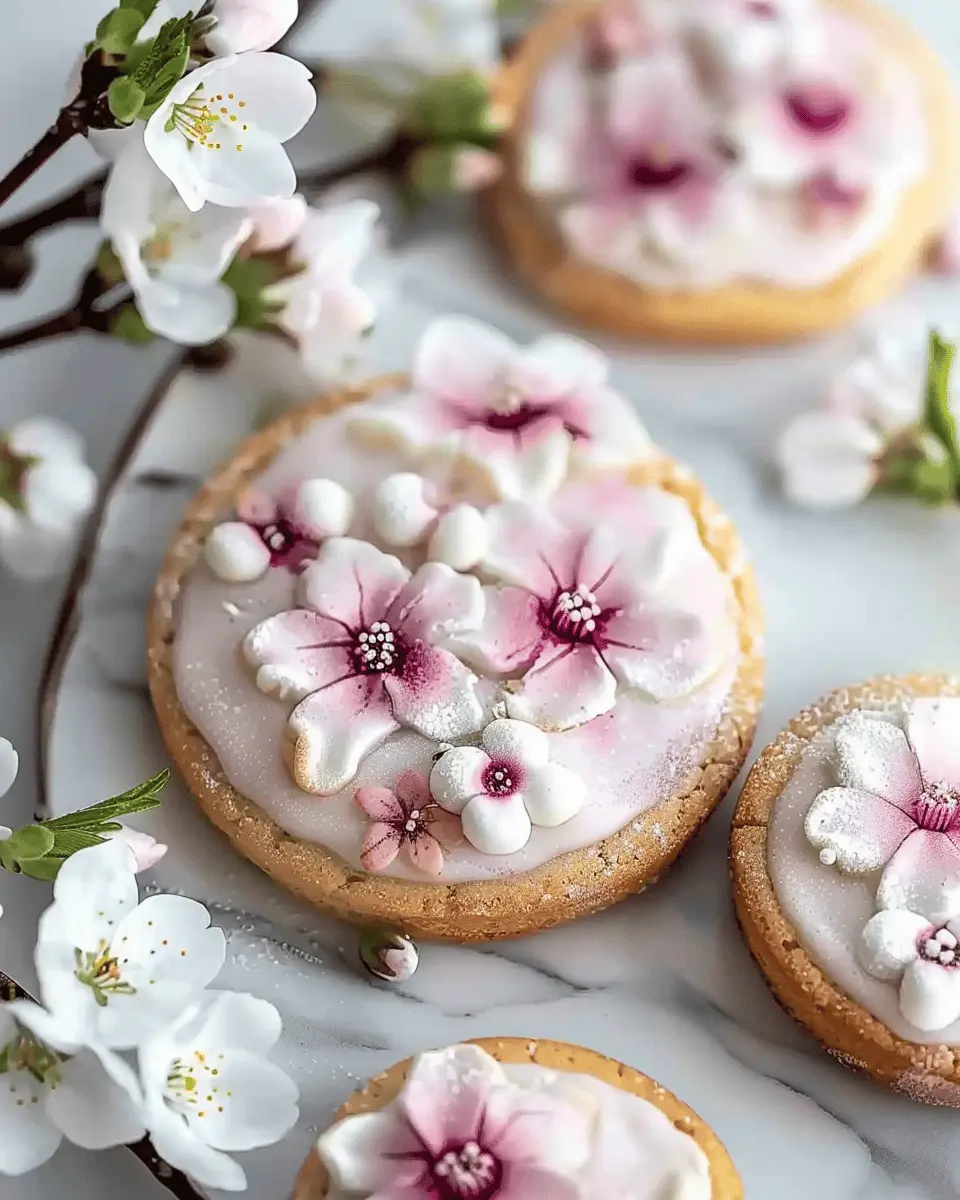
- 1/2 cup candied flower petals (like pansies or violets)
These ingredients are simple yet flavorful, perfect for showcasing the bright and beautiful feeling of spring.
Prepare the Dry Ingredients
Now that you have gathered your ingredients, it’s time to prepare the dry mix. In a medium mixing bowl, combine the following:
- 2 cups of all-purpose flour
- 1 teaspoon of baking powder
- 1/2 teaspoon of baking soda
- 1/4 teaspoon of salt
Whisk these together until they are nicely blended. This step is crucial as it ensures that the leavening agents are evenly distributed, contributing to a light and fluffy texture in your cookies.
Cream the Butter and Sugar
In a large mixing bowl, add 1 cup of softened unsalted butter, 1 cup of granulated sugar, and 1/2 cup of packed brown sugar. Using an electric mixer, beat these ingredients together until the mixture is light and fluffy—about 3 to 5 minutes. This process incorporates air into the butter, creating a lovely soft texture in your cookies.
Combine Wet Ingredients
In a separate bowl, crack in 2 large eggs and add 1 teaspoon of vanilla extract. Whisk them together, then gradually add this mixture to the creamed butter and sugar. Beat on medium speed until everything is just combined, creating a smooth blend that will hold all the flavorful additions.
Mix in the Dry Ingredients
Now comes the fun part! Gradually add the dry ingredients to the wet mixture, mixing on low speed until everything is just combined. Avoid overmixing here; you want those spring blossom cookies to retain that tender bite.
Add Candied Flower Petals
One of the best aspects of these cookies is the vibrant touch of nature! Gently fold in 1/2 cup of candied flower petals. These add a delightful hint of sweetness and visual appeal to your cookies.
Shape the Cookies
Using a cookie scoop or two spoons, drop rounded tablespoons of dough onto a baking sheet lined with parchment paper. Make sure to leave enough space between each cookie, as they will spread while baking.
Bake and Cool
Preheat your oven to 350°F (175°C). Bake the cookies for about 10-12 minutes, or until the edges are lightly golden. Keep an eye on them to avoid overbaking; spring blossom cookies are best enjoyed soft! Once baked, let them cool on the baking sheet for a few minutes before transferring them to a wire rack to cool completely.
With these easy steps, you’ll have a batch of beautiful spring blossom cookies to share with friends or keep all to yourself! They’re not just cookies; they’re whimsical bites of spring that brighten up any day. Enjoy!
Fun Variations on Spring Blossom Cookies
Using Different Flavors of Extracts
One of the most delightful aspects of baking spring blossom cookies is the freedom to play with flavors. While the classic vanilla extract is fantastic, why not experiment? Here are some flavor ideas to consider:
- Almond Extract: This can add a lovely, nutty undertone that pairs wonderfully with the sweetness of the cookies.
- Lemon Zest: A dash of lemon extract or even freshly grated zest can invigorate the dough, giving your cookies a refreshing twist.
- Maple Syrup: Instead of sugar, try a splash of pure maple extract for a hint of warmth. It’s a fabulous way to evoke those cozy, spring mornings.
The beauty of customizing flavors means you can make each batch unique. Have you ever paired coconut extract with lime zest? The combination is both tropical and invigorating.
Decorating with Edible Glitter
Let’s face it—not all cookies need to be basic. Adding a touch of edible glitter to your spring blossom cookies can elevate your treat from ordinary to extraordinary. Here’s how to do it:
- Pre-Bake Dazzle: Sprinkle edible glitter onto the dough before baking for a sparkling finish that fuses into the cookie.
- Post-Bake Glam: After cooling, brush the cookies lightly with a little corn syrup and then dust with glitter for a shimmering effect that’s sure to impress!
Edible glitter not only adds a visual impact, but it can also encourage creativity in home baking. For more tips, check out this glitter guide for choosing the right types and brands.
Whether you’re planning a spring gathering or just treating yourself, these variations can turn your spring blossom cookies into a memorable culinary experience. Happy baking!
Cooking Tips and Notes for Spring Blossom Cookies
Ensuring the Perfect Cookie Texture
Achieving the perfect texture in your spring blossom cookies is all about the balance of ingredients. Make sure your butter is softened but not melted; this helps incorporate air into your dough for that delightful softness. Also, consider chilling your dough for about 30 minutes before baking. Chilling firms up the butter and strengthens the flavors, resulting in a chewier texture that you and your friends will love.
Best Practices for Baking
When it comes to baking, consistency is key! Here are some best practices to ensure your cookies come out just right:
- Oven Temperature: Always preheat your oven for even baking. Invest in an oven thermometer to ensure accuracy.
- Baking Sheets: Use parchment paper for easy removal and crisp bottoms. Avoid greased sheets that can result in over-browning.
- Spacing: Give your cookies enough room on the baking sheet. This allows them to spread properly and develop that signature shape.
For more baking tips, check out professional resources like King Arthur Baking or America’s Test Kitchen. Happy baking!
Serving Suggestions for Spring Blossom Cookies
Pairing with Tea or Coffee
When it comes to enjoying your spring blossom cookies, the right pairing can elevate their delightful flavors. Brew a pot of your favorite herbal tea or rich coffee, and watch your taste buds dance with joy. Floral teas, such as chamomile or hibiscus, complement the sweetness of the cookies beautifully. If you prefer coffee, a smooth espresso or a creamy latte works wonders too. According to experts, the warming notes of coffee can enhance the biscuit’s buttery texture, creating a perfect harmony.
Creative Ways to Gift Your Cookies
Want to spread the joy of your spring blossom cookies? Consider presenting them in charming ways! Here are some ideas:
- Decorative Boxes: Wrap your cookies in colorful boxes, adding a personal touch with a handwritten note.
- Mason Jars: Layer the cookies in a mason jar for a rustic look; it’s a delightful keepsake your friends will cherish.
- DIY Gift Baskets: Pair your cookies with some artisanal coffee or tea and a cute mug for a thoughtful gift.
These unique packaging options not only make your cookies stand out but also create a memorable gifting experience. For even more ideas on gifting, explore popular lifestyle blogs that focus on creative packaging and presentation.
With these thoughtful serving suggestions, your spring blossom cookies will surely be the highlight of any occasion!
Time Breakdown for Spring Blossom Cookies
Preparation Time
Getting started with your spring blossom cookies is half the fun! Set aside about 20 minutes to gather your ingredients and prepare the dough. Make sure to let your butter soften at room temperature; it can make all the difference in texture. While you’re at it, consider putting on some lively music to elevate that baking spirit!
Baking Time
Once your dough is ready, the baking process typically takes around 10-12 minutes. Keep an eye on them, as ovens can vary in temperature. You’ll want those cookies to be lightly golden around the edges and soft in the middle for that perfect melt-in-your-mouth experience. If you’re curious about the ideal baking temperatures, take a look at resources like the American Baking Institute.
Total Time
In total, you’re looking at roughly 30-35 minutes from start to finish—perfect for a quick treat during your busy day. Whether it’s a weekend gathering or a cozy night in, these delightful spring blossom cookies will bring a touch of sweetness to any occasion! Plus, you’ll have some delicious cookies in no time!
Nutritional Facts for Spring Blossom Cookies
When you whip up a batch of spring blossom cookies, knowing their nutritional profile can help you enjoy them guilt-free. Here’s a quick overview of the key components:
Calories
Each cookie packs around 120 calories. While enjoying a sweet treat is a joyful part of baking, it’s good to balance them with your daily nutritional needs.
Sugars
These delightful cookies contain about 8 grams of sugar per serving. If you’re watching your sugar intake, you can always experiment with natural sweeteners or reduce the amount of sugar in your next batch.
Fats
With approximately 5 grams of fat, spring blossom cookies can fit into a balanced diet. The majority of fats come from butter, which adds that delicious flavor and texture!
For more on the benefits of maintaining balanced meal options, check out the resources from the USDA or explore Nutritional Guidelines. Happy baking!
FAQs about Spring Blossom Cookies
Making spring blossom cookies can stir up some questions, so let’s dive into a few frequently asked ones to help you master this delightful treat!
Can I substitute the flowers?
Absolutely! While the edible flowers in spring blossom cookies add a beautiful touch, you can experiment with different flavors. If you’re not keen on using flowers, consider adding zest from citrus fruits like lemons or oranges for a zesty pop. Even dried fruit can work wonders—think dried cranberries or cherries!
What other cookies can I make with similar ingredients?
If you love the base of spring blossom cookies, you’re in luck. You can create variations like:
- Lemon Sugar Cookies: Swap the flowers for lemon zest and juice.
- Coconut Macaroons: Instead of flour, opt for shredded coconut to give your cookies a chewy texture.
- Almond Biscotti: Use almond extract and chopped almonds for a crunchy treat.
Each of these options allows you to utilize your basic cookie dough while adding unique twists that cater to your taste buds!
How do I store my cookies?
To keep your spring blossom cookies fresh, store them in an airtight container at room temperature. They should last about a week. For longer storage, consider freezing them. Just make sure they’re completely cooled before placing them in a freezer bag. When you’re ready to enjoy them again, simply let them thaw at room temperature!
If you’re looking for more baking tips, check out resources from King Arthur Baking for insights on cookie storage and shelf life. Enjoy baking!
Conclusion on Spring Blossom Cookies
The Joy of Baking Your Own Treats
Baking is more than just a task; it’s a delightful experience that brings a sense of accomplishment. Creating your own spring blossom cookies allows you to fill your kitchen with enticing aromas, all while expressing your creativity. These cookies make for a perfect addition to any spring gathering or simply as a sweet indulgence for yourself.
Imagine biting into that soft, chewy texture topped with vibrant colors. With each bite, you’ll feel the joy of spring! Plus, baking with friends or family can create cherished memories. So, why not gather your loved ones, grab some fresh ingredients, and let the baking magic begin? For more tips and tricks, check out resources like King Arthur Baking or Food52 for inspiration and community feedback.
PrintSpring Blossom Cookies: Easy Recipes for Homemade Delights

Delight in these easy-to-make Spring Blossom Cookies, perfect for any occasion.
- Prep Time: 15 minutes
- Cook Time: 12 minutes
- Total Time: 27 minutes
- Yield: 24 cookies 1x
- Category: Desserts
- Method: Baking
- Cuisine: American
Ingredients
- 2 cups all-purpose flour
- 1 cup granulated sugar
- 1/2 cup unsalted butter
- 2 large eggs
- 1 teaspoon vanilla extract
- 1/2 teaspoon baking powder
- 1/4 teaspoon salt
- 1 cup powdered sugar
Instructions
- Preheat the oven to 350°F (175°C).
- In a bowl, cream together butter and granulated sugar until light and fluffy.
- Add eggs and vanilla extract, mix well.
- In another bowl, whisk together flour, baking powder, and salt.
- Gradually add dry ingredients to the wet mixture, stirring until just combined.
- Shape dough into small balls and place on a baking sheet.
- Bake for 10-12 minutes until lightly golden.
- Allow cookies to cool and then dust with powdered sugar.
Notes
- For added flavor, consider mixing in chocolate chips.
- Store cookies in an airtight container to maintain freshness.
Nutrition
- Serving Size: 1 cookie
- Calories: 150
- Sugar: 10g
- Sodium: 50mg
- Fat: 7g
- Saturated Fat: 4g
- Unsaturated Fat: 2g
- Trans Fat: 0g
- Carbohydrates: 20g
- Fiber: 0g
- Protein: 2g
- Cholesterol: 30mg
Keywords: Spring Blossom Cookies, homemade cookies, easy cookie recipes